


Table of contents
If you've ever used a computer, you're probably familiar with Microsoft Windows. But there's another popular operating system out there called Linux. So, what exactly is Linux? In short, it's a free and open-source operating system that can be installed on almost any computer. That means that, unlike Windows, you don't have to pay for a license to use it. And because it's open-source, anyone can contribute to its development.
Linux is known for being extremely stable and reliable. That's why it's often used for servers, which need to be up and running 24/7. It's also popular with programmers and developers, providing them with a flexible platform for creating software applications.
Popular Linux Distributions
There are many different Linux distributions, or "distros", each offering a unique combination of features and software. Whether you're looking for a general-purpose operating system or one tailored for a specific task, a Linux distro is right for you.
Some of the most popular Linux distributions are:
Ubuntu Linux: a good distribution for beginners
Red Hat Enterprise Linux: for the commercial market
Linux Mint: a community-driven Linux distribution based on Ubuntu
Kali Linux: a popular distribution for hackers
Fedora: a general-purpose operating system
How To Install Linux on Your Computer
So, you're ready to take the plunge and install Linux? Great! Linux is a powerful and versatile operating system that can be customized to suit your needs. However, before you begin, there are a few things you need to know.
Virtualization
Enabling virtualization on your computer can be a great way to improve its performance. Virtualization allows you to run multiple operating systems simultaneously, so you can switch between them without having to reboot. To enable virtualization, these are the few things you need to do:
1) You'll need to make sure your CPU supports virtualization. The easiest way to check is by opening the task manager and switching to the performance tab.
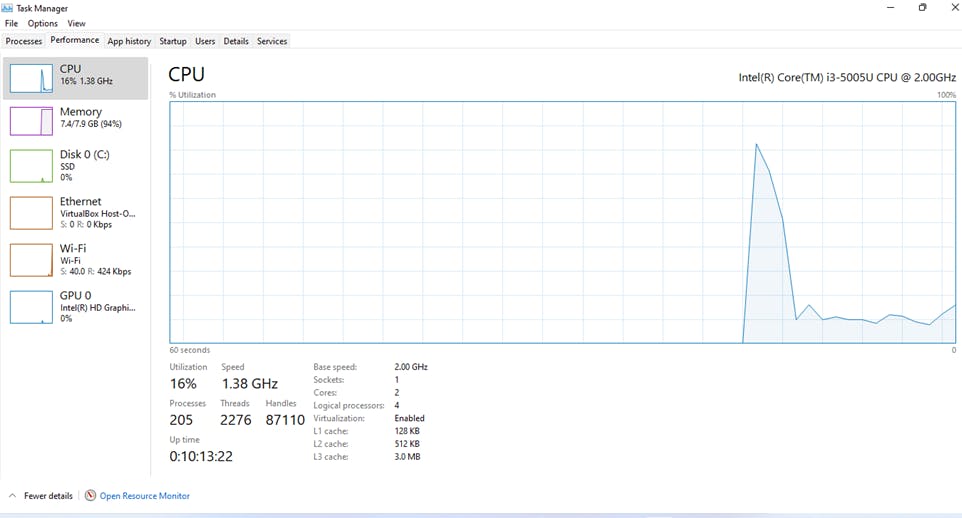
2) Once you've verified that your CPU supports virtualization and is not enabled, you can enable it in the BIOS/UEFI settings.
Hyper-V
We shall be installing our Linux Operating system on a virtual machine (VM). It's important to note that you should disable Hyper-V before installing Linux on VirtualBox. Otherwise, you may run into compatibility issues. Hyper-V is a Microsoft virtualization technology that is designed for use with Windows. VirtualBox, on the other hand, is a cross-platform virtualization tool that can be used with Windows, Linux, and macOS.
- To disable Hyper-V in Control Panel, follow these steps:
1) In Control Panel, select Programs and Features.
2) Select Turn Windows features on or off.
3) Expand Hyper-V, expand Hyper-V Platform, and then clear the Hyper-V Hypervisor check box.
- To disable Hyper-V using Windows PowerShell, follow these steps:
1) Open an elevated PowerShell window.
2) Run the following command:
Disable-WindowsOptionalFeature -Online -FeatureName Microsoft-Hyper-V-Hypervisor
System Requirements
You'll need to check if your computer meets the minimum requirements for Linux. Most distributions require an 800 MHz processor and 512 MB of RAM. Still, it's always best to check the specific requirements for the distro you're interested in.
Also, you'll need to choose a distro. There are many different distributions of Linux available, each with its benefits and drawbacks. Once you've selected a distro, you'll need to download the installer and burn it to a DVD or USB drive. Finally, you'll need to boot from the DVD or USB drive and follow the instructions on-screen. If all goes well, you should be up and running with Linux in no time! We shall be installing Ubuntu (a good distribution for beginners) and Kali Linux (a popular distribution for hackers). Before beginning the installation process, let's talk about Virtual Machines (VM).
Virtual Machines (VM)
Virtual machines (VM) allow you to run multiple operating systems on one piece of hardware, such as your laptop or desktop. This means you can continue to run your Windows or macOS operating system you are familiar with and run a virtual machine of kali Linux inside the operating system. You don't need to overwrite your existing OS to learn Linux.
There are numerous virtual machine applications available. VMware, Oracle, and Microsoft are all examples of VM vendors. For the sake of this article, we will be focusing on VirtualBox by Oracle.
How to Install VirtualBox
Installing VirtualBox is a pretty straightforward process; it only takes a few minutes to get up and running. Here's a quick step-by-step guide:
1) First, head to the VirtualBox website and download the latest software version.
2) Once the file has been downloaded, double-click on it to start the installation process.
3) Next, you'll be prompted to choose an installation location. Select a location on your hard drive and click "Next."
4) The setup wizard will now install VirtualBox on your computer. Once the installation is complete, click "Finish."
Setting Up Your Virtual Machine
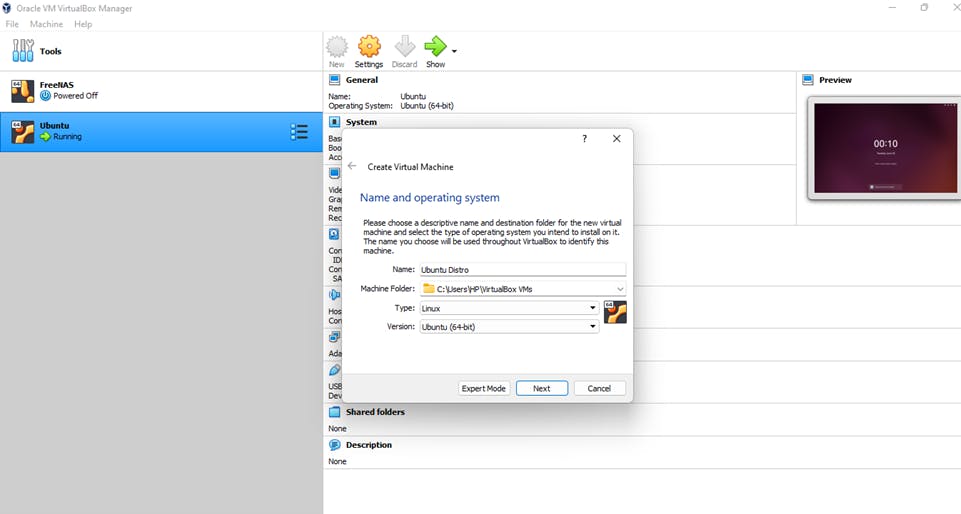
1) Now that VirtualBox is installed, you're ready to start using it! To create a new virtual machine, click "New" in the VirtualBox application window. You'll be prompted to enter a name for your machine and select the operating system you want to install.
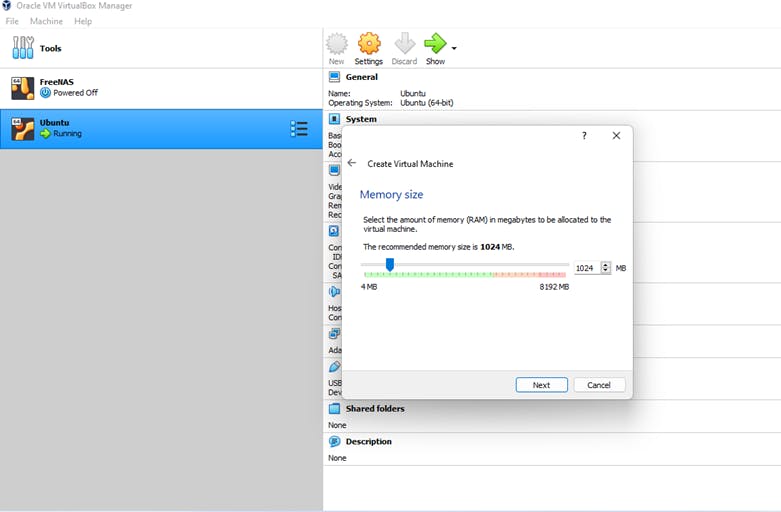
2) Select how much RAM you want to allocate to this new virtual machine. As a rule of thumb, we won't recommend using more than 25% of your total system RAM. Remember, you must also leave enough RAM operating system and any other virtual machines you might want to run simultaneously. Please note that your virtual machine will not use any RAM when you are not using them.
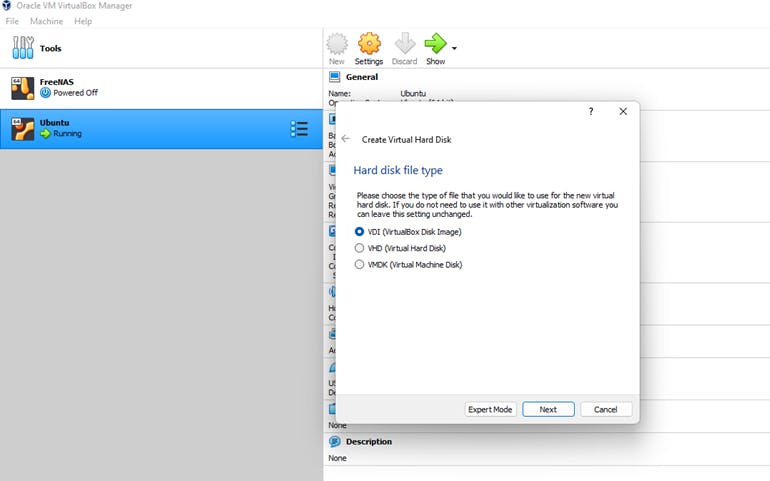
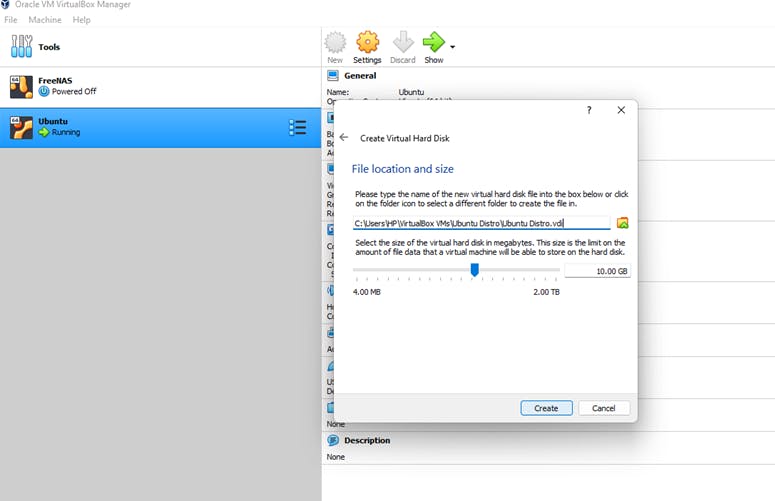
3) Now, click next, and you will get to the hard disk screen. Choose Virtual Hard disk and click create. The next screen is for you to decide whether you want the hard drive you are creating to be allocated dynamically or at a fixed size. We suggest you choose "Dynamically allocated," this will ensure your system does not take the maximum size you allocate for the virtual hard disk until you need it. Saving more unused hard disk space for your host system.
4) Click Next, and choose the amount of hard drive space to be allocated to your VM. Although the default is 8GB, we believe it is too small, and we would recommend that you allocate 20 – 25GB minimum.
5) After making your selections click "Create." The new virtual machine will now appear in the list of machines in VirtualBox. To start it, simply click on it and then click "Start."
6) Congratulations! You've now installed VirtualBox and created your first virtual machine. Now you're ready to explore all that virtualization has to offer. have fun!
How to install Ubuntu on VirtualBox
Setting up a virtual machine is a great option if you're looking to experiment with Ubuntu without installing it on your main computer. Here's a quick guide to get you started.
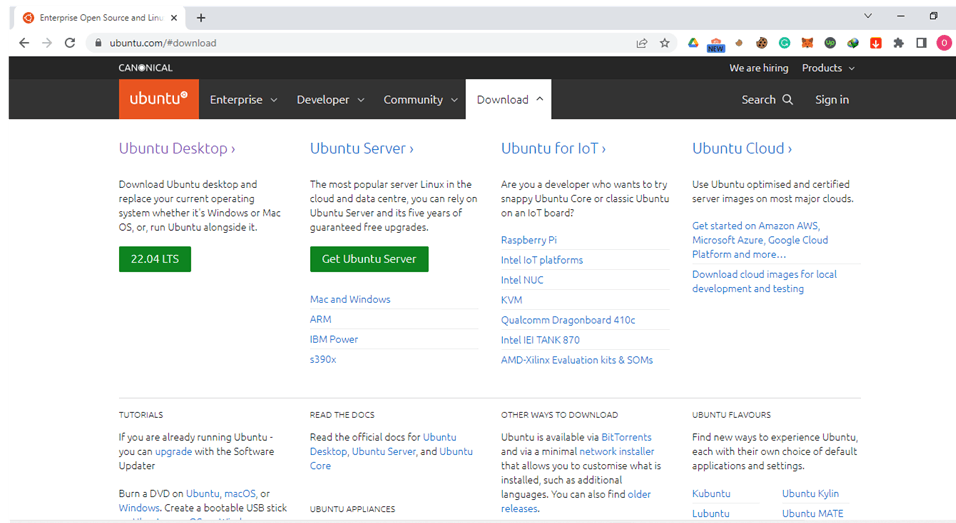
1) First, you'll need to download Ubuntu. You can find the latest version of Ubuntu at ubuntu.com/download.
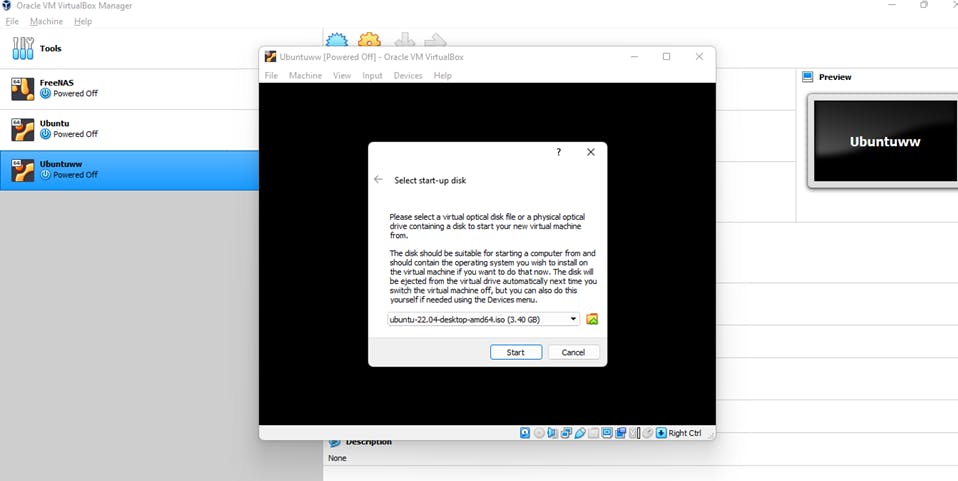
2) On the virtual machine created, click on start and select the ISO file downloaded as the startup disk.
3) The on-screen process will guide you through the installation of your Ubuntu distro.
How to Install Kali Linux on VirtualBox
1) Download Kali Linux on kali.org. On the homepage, click the downloads link at the top of the page. You will be faced with multiple download choices. You must choose the right download. I recommend you download the 64-bit version; this is suitable for 64-bit systems. Don't worry; modern systems use 64-bit. Download and install the 64-bit version of the full Kali (not light, lxde, or any other alternatives). If you are running an older computer with a 32-bit CPU, you will need to install the 32-bit version, which appears lower on the page.
2) On the virtual machine created, click the start button. The VirtualBox Manager will then ask where to find the startup disk. Remember, you've already downloaded a disk image with the extension .iso; this should be in your downloads folder. Click the folder icon, navigate the Downloads folder, and select the Kali file.
3) Then click start. Hurray, you've just installed Kali Linux on a virtual machine!
Setting Up Kali Linux
1) Once you click start, Kali will display a screen offering you several startup choices. I strongly suggest using the graphical install for beginners. Use your keyboard to navigate the menu.
2) You will then be asked to select the language of your choice. Select the language you feel most comfortable working in and then click continue. Select your location and click continue.
3) Now, VirtualBox will go through a lot of processes to detect your hardware and network adapters. At this point, there is nothing you can do; wait patiently.
4) You will be asked to configure your network. The first thing it will ask for is the hostname. You can choose to name it anything, but it is okay if you leave it as Kali. Next, you will be prompted for the password for the root user. Type it and click continue.
5) In Linux, the root user is the most powerful administrator. So, you might want to use a strong password. Click continue, and you will be asked to set your time zone. Do it and then continue.
6) Next, you need to partition your drive. Choose Guided – use the entire disk. At this point, kali will automatically detect your hard drives and set up a partitioner.
7) You will be warned that all data on your selected disk will be erased. But don't worry; this is a virtual disk, and the disk is new and empty, so it won't affect or disturb anything. You will be prompted to choose between "all files in one partition or separate partition." It is safe and best you choose all files in one partition. You will be asked whether to write your changes to disk. Select Finish partitioning and write changes to disk. You will be prompted one more time. Select yes and continue.
8) Now, Kali will begin to install the operating system. This could take some minutes, so be patient. Once the installation is complete, you will be asked whether you want to use a network mirror; this is not important, so choose No.
9) Kali will prompt you if you want to install GRUB (Grand Unified Bootloader). A bootloader simply allows you to select a different operating system to boot into. Select Yes and continue.
10) On the subsequent screen, you will be asked whether you want to install GRUB automatically or manually. Choose automatically. For unknown reasons, if you choose manually, Kali will tend to hang and display a blank screen after installation. So, choose the second option, not "enter device manually."
11) Congratulations! You've installed Kali. Click continue. Kali will try to reboot, and you will see several lines of codes go across a blank before you are greeted with kali.
12) Log in as root. Your username is "root." And your password is what you choose during installation.
Conclusion
All in all, installing Ubuntu was fairly easy and straightforward. The same cannot be said for Kali Linux, which proved to be much more difficult to install. This could be because Kali is a security-focused distro for professionals and hackers. Despite the challenges involved with installing Kali, it's an incredibly powerful tool that can be used for various purposes. In short, if you're looking for an operating system that is both user-friendly and versatile, Ubuntu is a good option. Still, suppose you need something more specialized, like penetration testing or malware analysis. In that case, Kali Linux may be a better choice.
What are your thoughts on using Linux distributions? Have you tried any other distros?