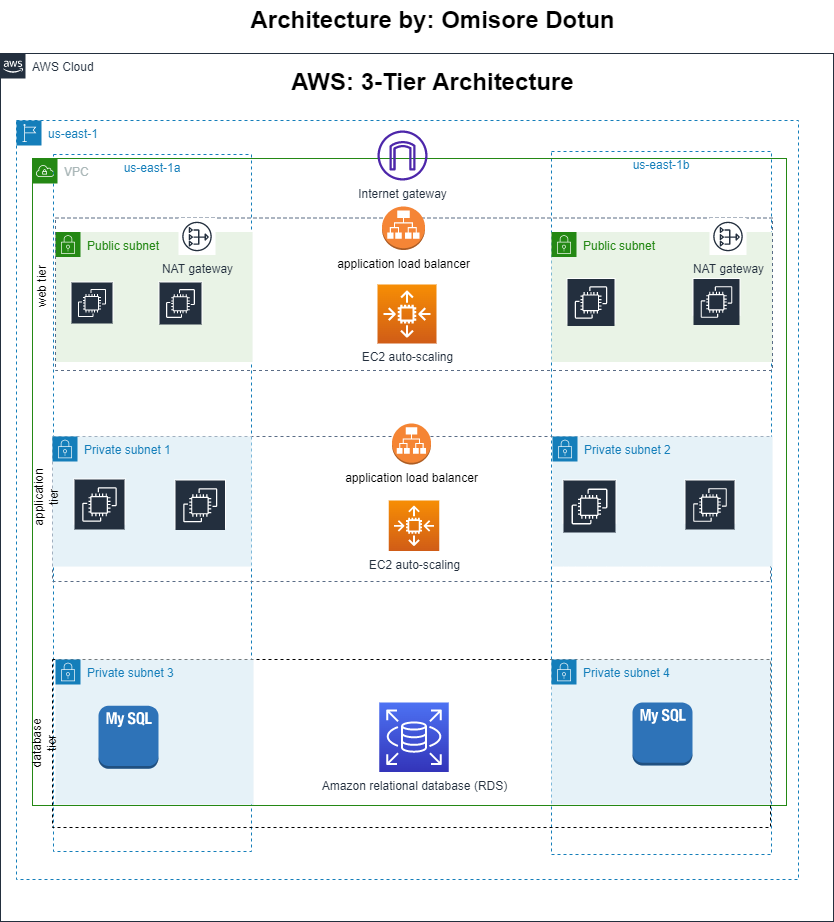
AWS 3-tier Architecture

Hey there! I'm a DevOps engineer, and I absolutely love what I do. I'm passionate about working with code and making sure everything is running smoothly. But I also have a real flair for writing. I want to make technical information more accessible to beginners, and help people feel confident using technology. That's why I've decided to combine my two passions and start writing about tech.
I'll be sharing tips, tricks and tutorials on everything from coding to cloud computing. So if you're new to the world of tech, or just want to learn more about what goes on behind the scenes, be sure to check out my blog.
AWS 3-tier architecture is a logical and physical structure that separates your application into three tiers: the web, the application, and the database. By separating your application into these three tiers, you can create a scalable and highly available architecture that can be easily implemented using AWS services.
The web tier: handles incoming HTTP requests from clients and delivers static content such as HTML, CSS, and JavaScript files.
The application tier: is responsible for processing dynamic requests from clients and interacting with the database to retrieve or update data.
The database tier: is responsible for storing data in a durable and scalable way.
In this post, we will build all tiers using the AWS console. The architecture diagram of what we are trying to accomplish is included below.
Must-have:
AWS account with appropriate permissions Let's get started!
Web Tier
VPC
The first thing we will do is to create a new VPC using the AWS console. The new VPC will house all of our infrastructures for this project.
To get started, we will log in to our AWS account and navigate to the VPC section of the dashboard. Then, click on the create VPC button. Next, we will select a name and CIDR address for our VPC. For this project, we will assign a CIDR address of 10.0.0.0/16 to our VPC. Once you have entered all the required information, click the Create VPC button to finalize the process. That's it! Our new VPC is now ready for use.

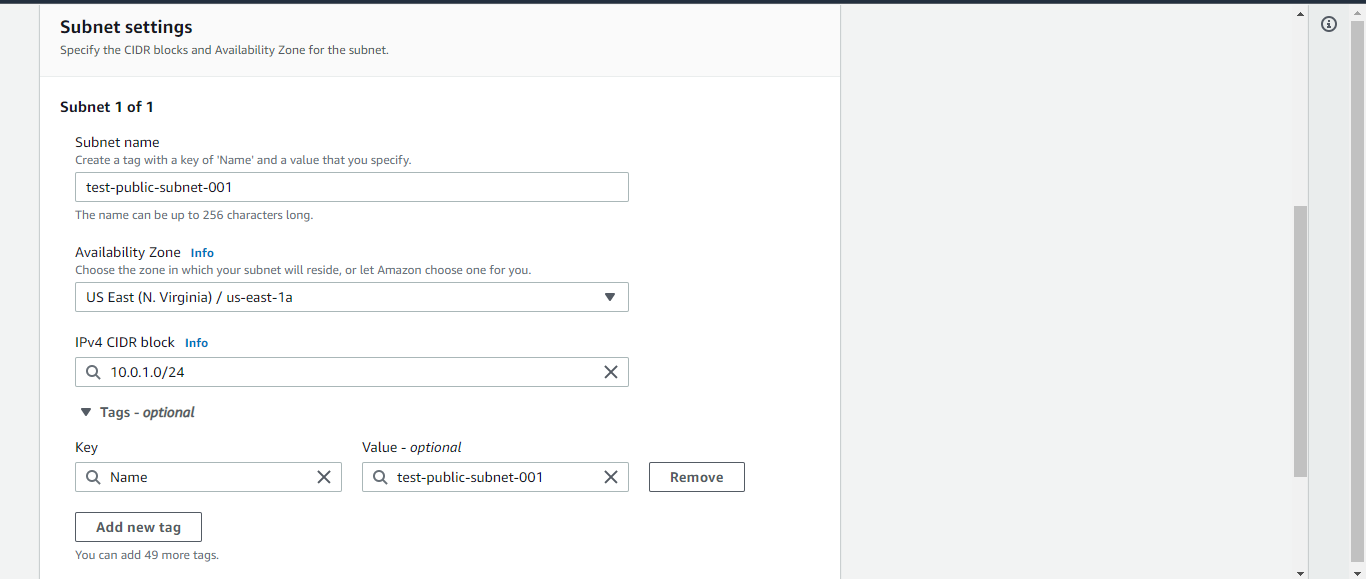
Subnets
We will need two public subnets for our web tier. The public subnets are where we'll deploy all of the EC2 instances that service as servers. They must be provisioned in different zones to ensure availability!
On the left-hand side of the console, we will see Subnets in the navigation bar. Go ahead and click on it and then on Create subnet. Remember, we will create these subnets in our new VPC. On the next screen, select the new VPC, give the subnet a name, choose an availability zone, and assign a CIDR address of 10.0.1.0/24. Repeat this process to create the second public subnet. Give it another name, choose another different availability zone, and assign a CIDR address of 10.0.2.0/24.
Also, remember to enable auto-assign public IPv4 addresses since we are creating public subnets.
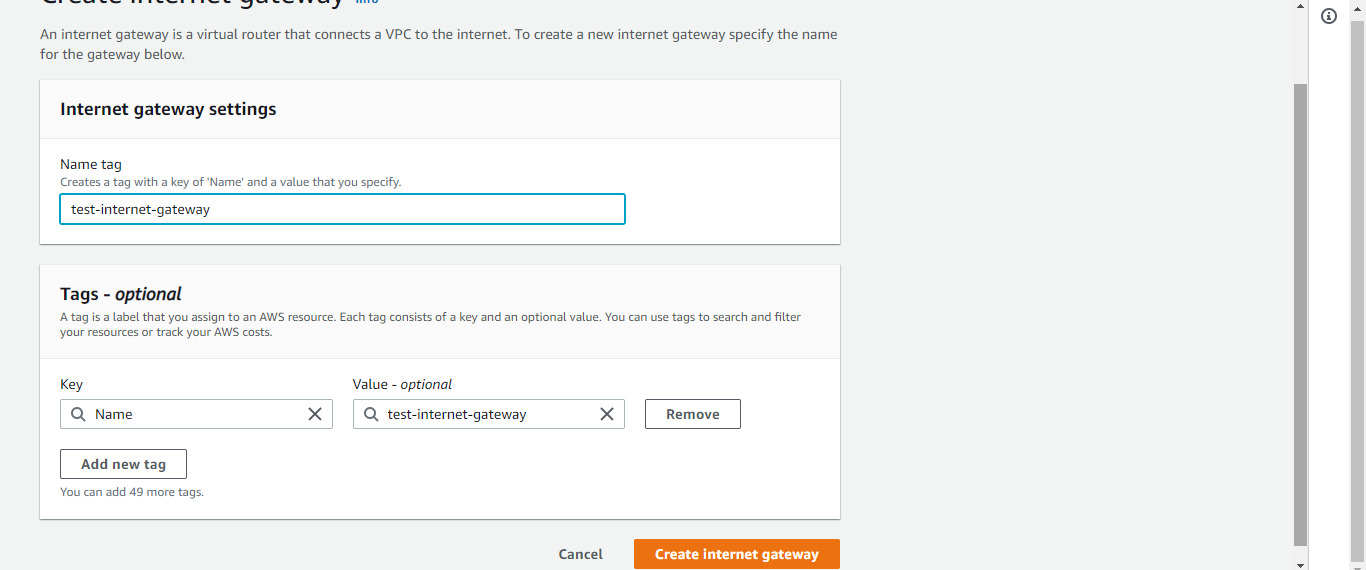
Internet Gateway
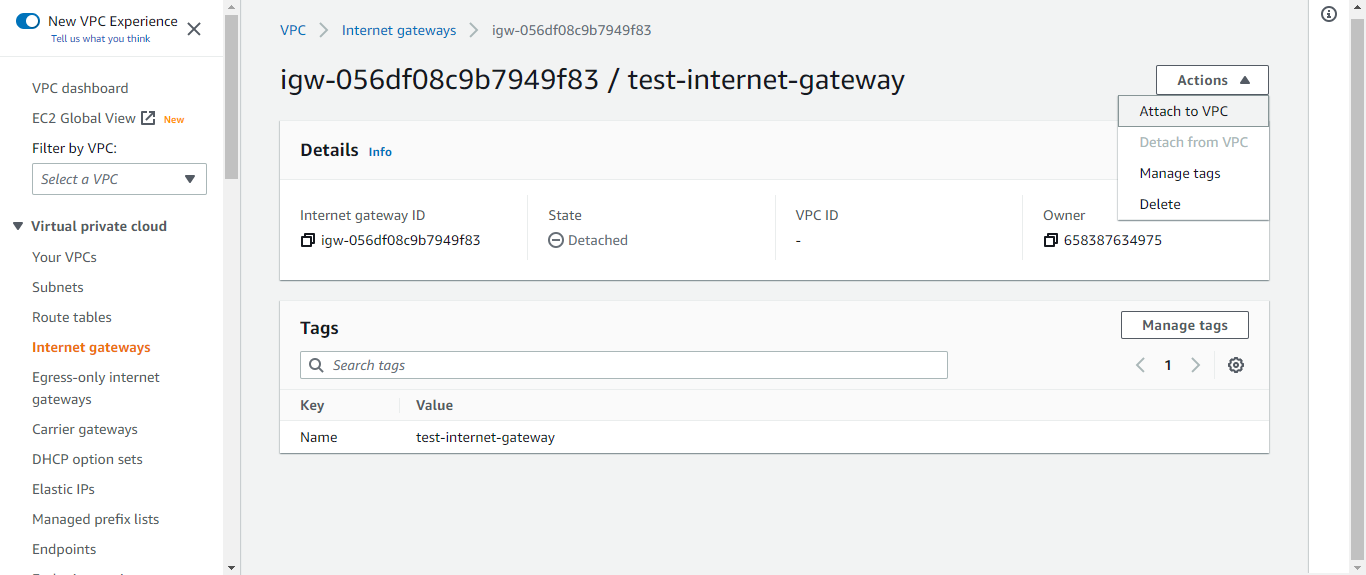
The next on the list is the internet gateway. Our resources in the public subnets need to connect to the internet. We will choose the Internet gateway on the left side of the console. Then, we will select Create internet gateway. We will give it a name and hit the create button. Now that our internet gateway is ready, we need to attach it to our VPC.
To attach it to our VPC, we will click on Actions, then hit the Attach to VPC option. We will select the VPC we created. On the screen, the state will change to attached. Our internet gateway has just been attached to our VPC!
NAT Gateway
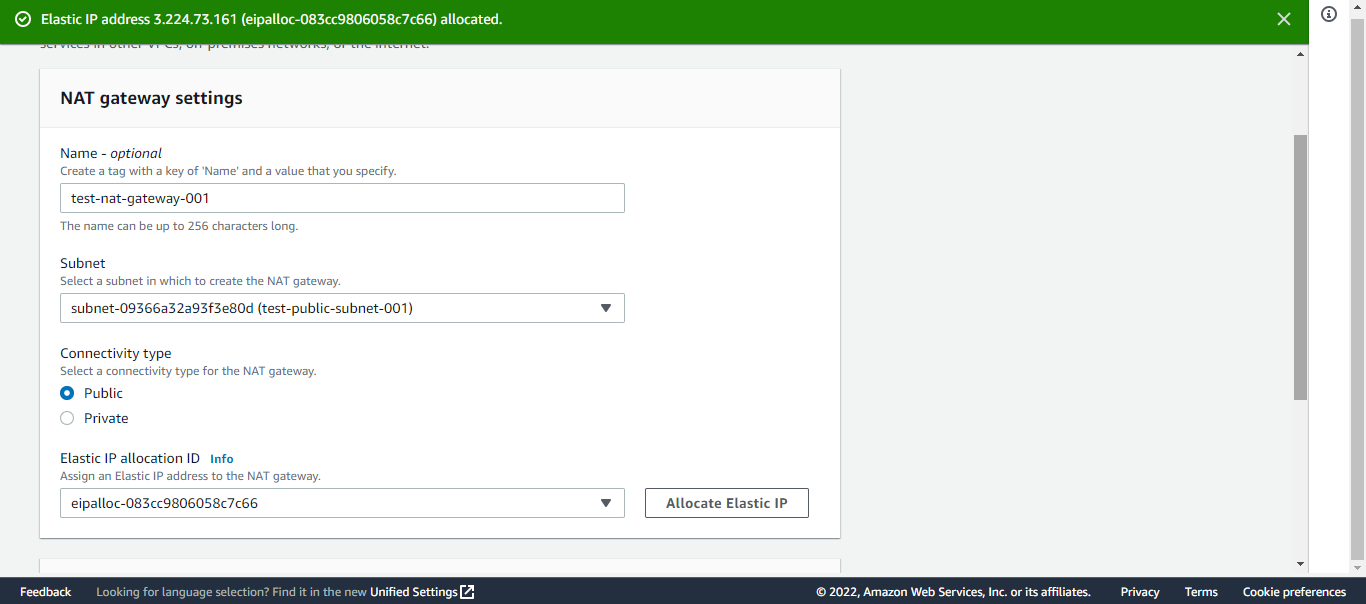
We need to create two network address translation (NAT) gateways. A NAT gateway enables resources in the private subnet to connect to the internet. Each of the NAT gateways will be associated with our public subnets.
On the left side of our VPC dashboard, we will choose NAT gateways and click on Create NAT gateway. We will give our NAT gateway a name, and we will select the public subnet, and finally, we will click on create NAT gateway.
An Elastic IP address is a reserved public IP address that can be assigned to any EC2 instance or NAT gateway. We will allocate an elastic IP address to our NAT gateway. For our NAT gateway, we will use an elastic IP address.
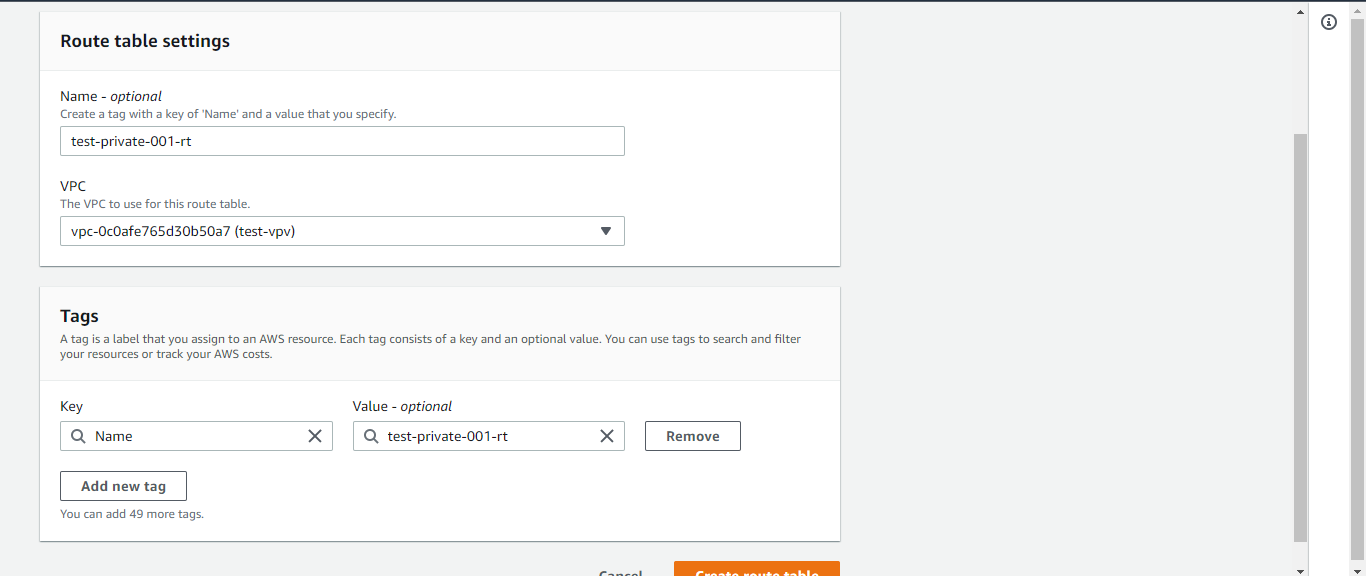
Route Table
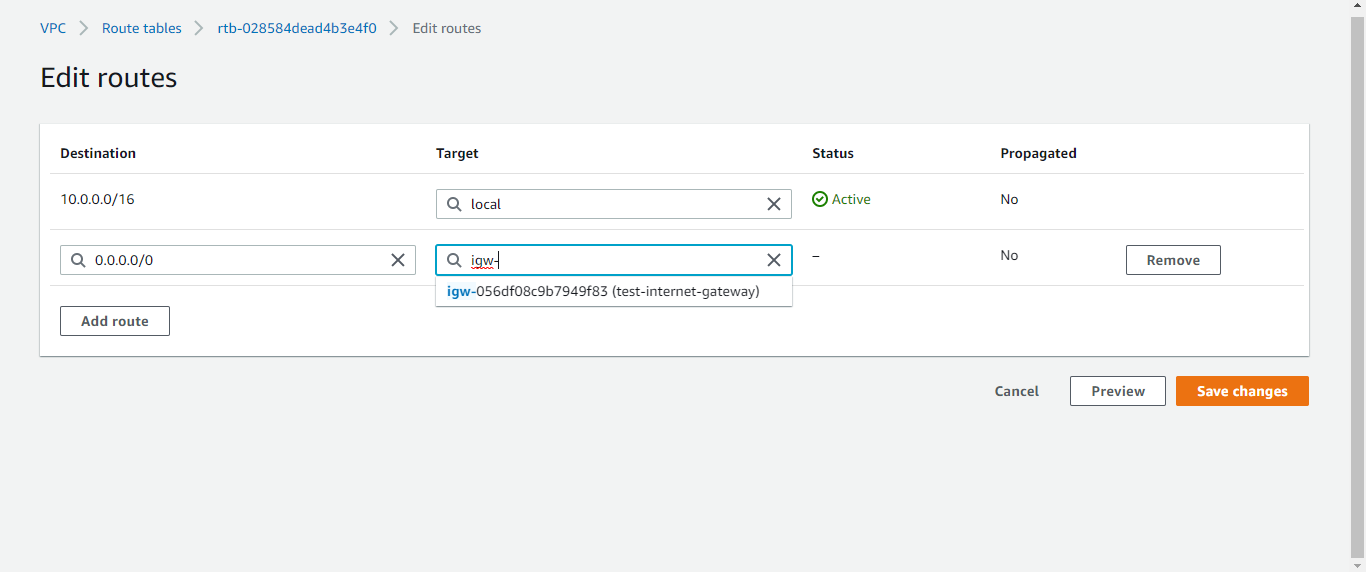
Next is the route table. Route tables control how traffic is routed between different subnets and access points. We will create a route table for our web tier.
On the left-hand side of the console, choose Route tables and Create route table. Give it a name, choose the VPC for this project, and hit the create route table button.
Now that our route table for this tier has been created, we need to edit it. First, we need to associate it with our public subnets. We will click on the route table we just created and click the Edit subnet association button. We will then select our two public subnets and click on save associations.
We also need to edit the route. On the route tab of our route table, we will click on Edit routes. We only need to ensure the table is set up so that it will reach the internet. The destination will be 0.0.0.0/0, and the target will be our internet gateway. Finally, select save changes.
Security Groups
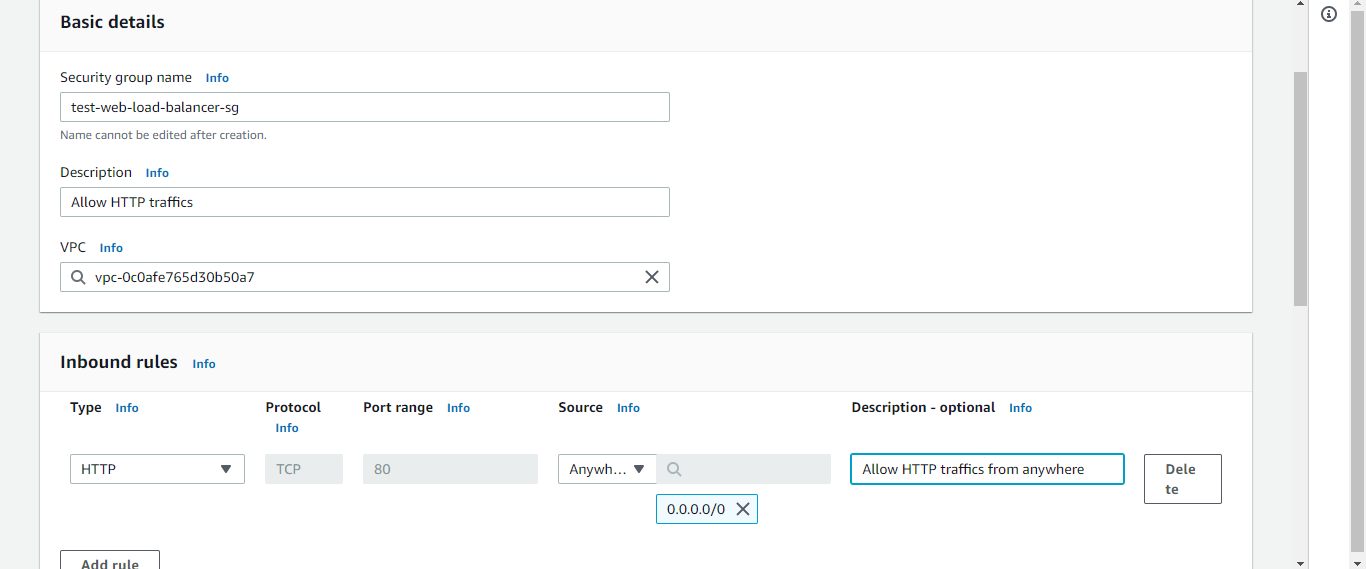
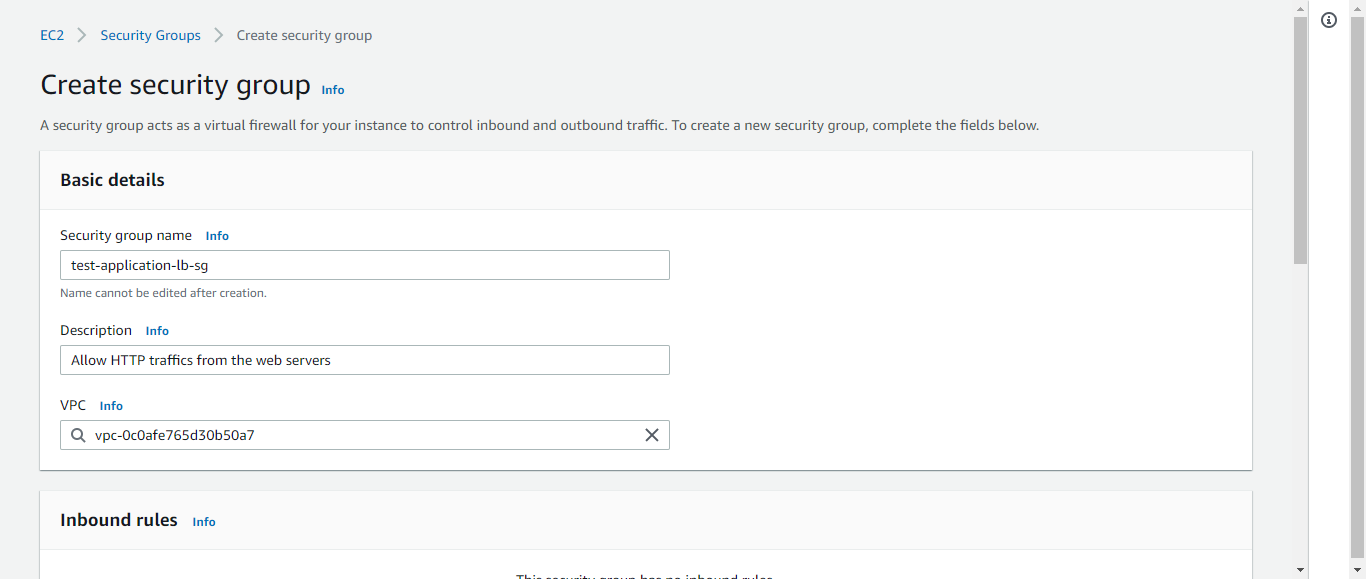
For this tier, we need to set up two different security groups. The first is for our web servers, and the other is for our load balancer. The former will only allow HTTP access from clients. While the latter will allow HTTP traffics from the load balancer. This process is known as security group chaining.
On the AWS dashboard, click on EC2. On the left side of the console, click on Security Groups. Select Create security group. Give it a name, description, and select the VPC for this project. In the inbound rule section, click on add rule. Select HTTP as the type and Anywhere as the source. We are all set for the load balancer security group.
Repeat this process for the web servers’ security group. But, select custom as the source and enter the security group ID of your load balancer.
Load Balancer
The next on our web tier list is the load balancer. While still on the EC2 dashboard, we will click on Load Balancers on the left side of our console. Click on Create load balancer. We will choose the application load balancer (ALB). We will give it a name and select internet-facing as the scheme. Choose the VPC for this project. Then, we will choose our two availability zones and select the public subnets we created.
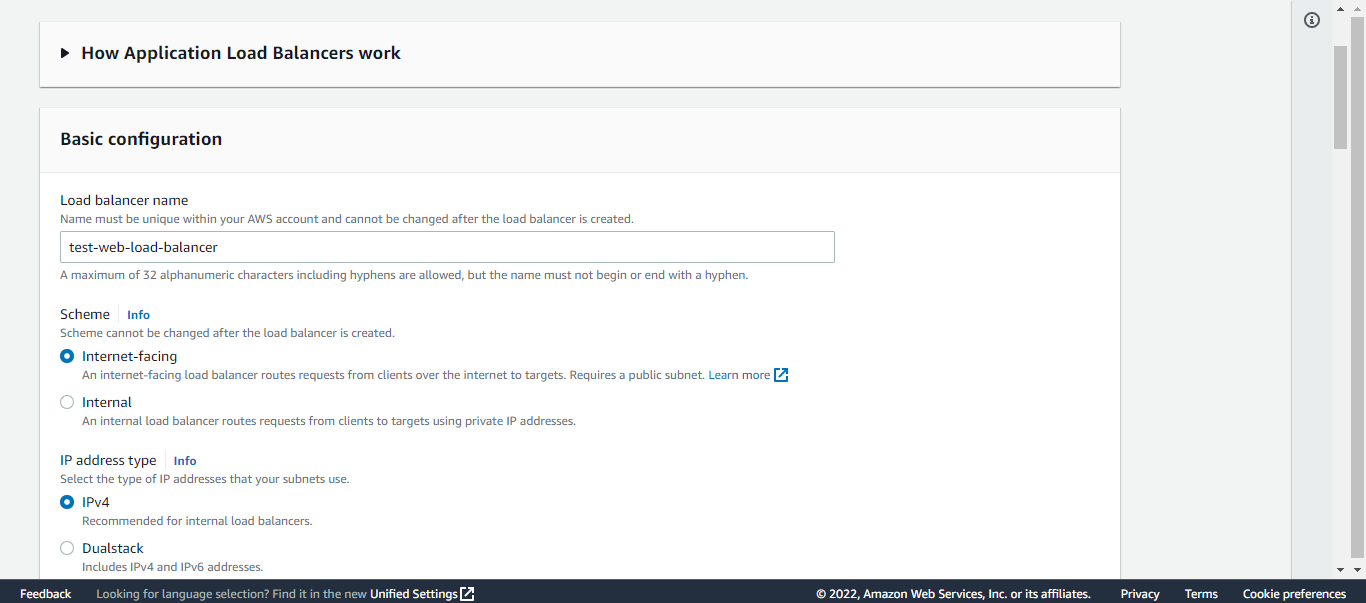
We will click next and select the security group we created for our load balancer.
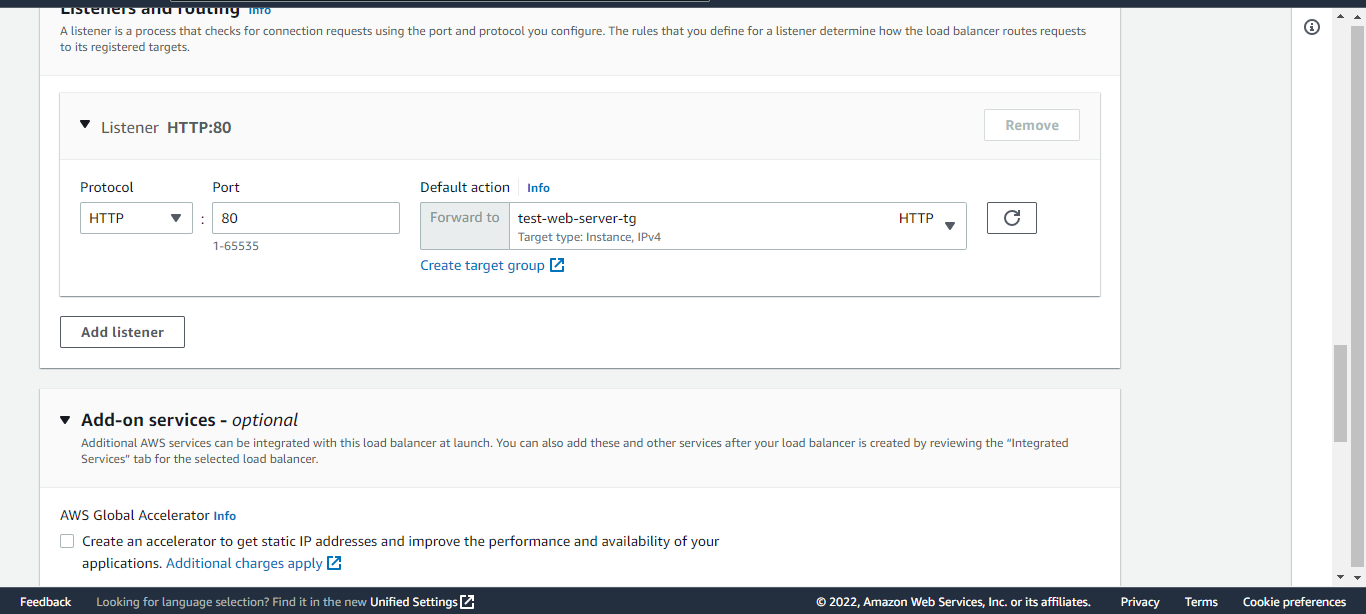
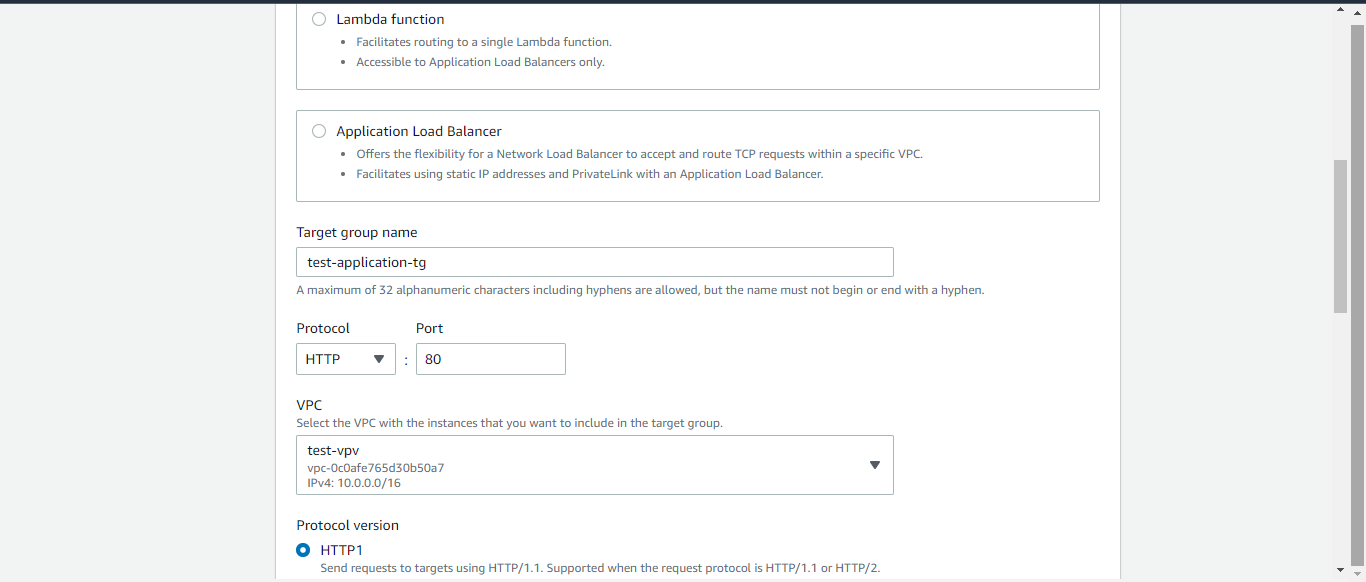
In the listeners and routing section, we need to select a target group, but as we can see, we have none. So, we will need to create one. Click on create target group, choose instances as the target type, give it a name and select the VPC for this project. Leave every other thing as default, click on next, and click on create target group.
Back to the create ALB tab, refresh the target group section alone, and select the target group we just created. Leave every other thing as default and click on create the load balancer.
Auto Scaling Group
We need to set up an auto-scaling group for our web tier. The Auto Scaling Group is a powerful tool to help us maintain optimal performance and availability. It monitors the instance metrics, such as CPU or memory usage; then, based on your desired level of service, it automatically scales up (or down) instances to meet those demands!
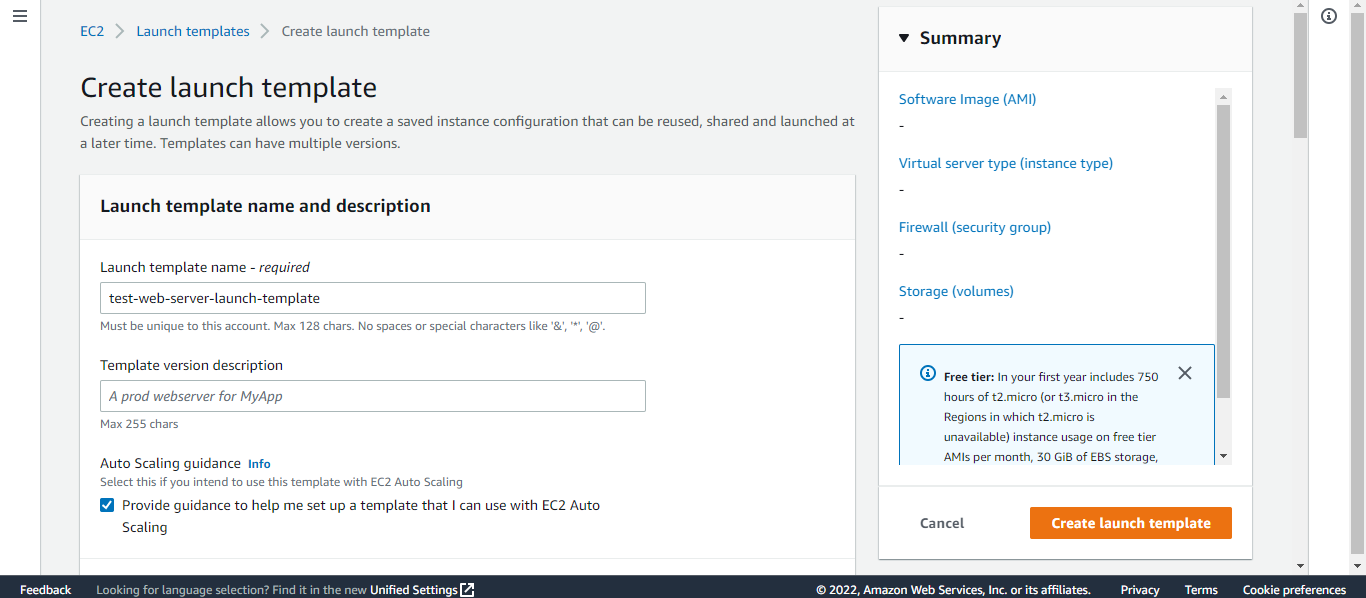
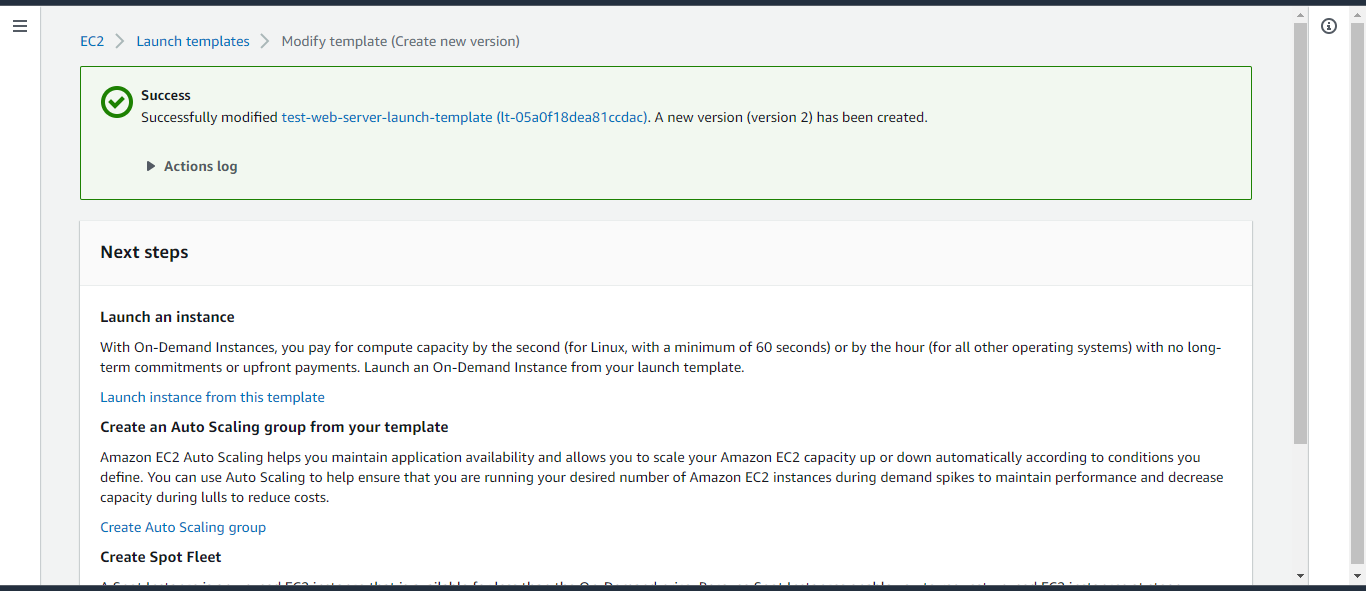
But before we set up an auto-scaling group, we must create a launch template. While still on the EC2 dashboard, click on Launch Templates. Then click on Create launch template. We will give our launch template a name, and tick provides auto-scaling guidance. Choose your AMI, instance type, and key pair (create a new one if you don’t have one).
In the network section, click on select existing security group, and choose the security group we created for our web servers. Click on advanced details, scroll down to user data, and paste the following script. If you have your own script, feel free to paste it.
#!/bin/bash
yum update -y
yum install httpd -y
systemctl start httpd
systemctl enable httpd
cd /var/www/HTML
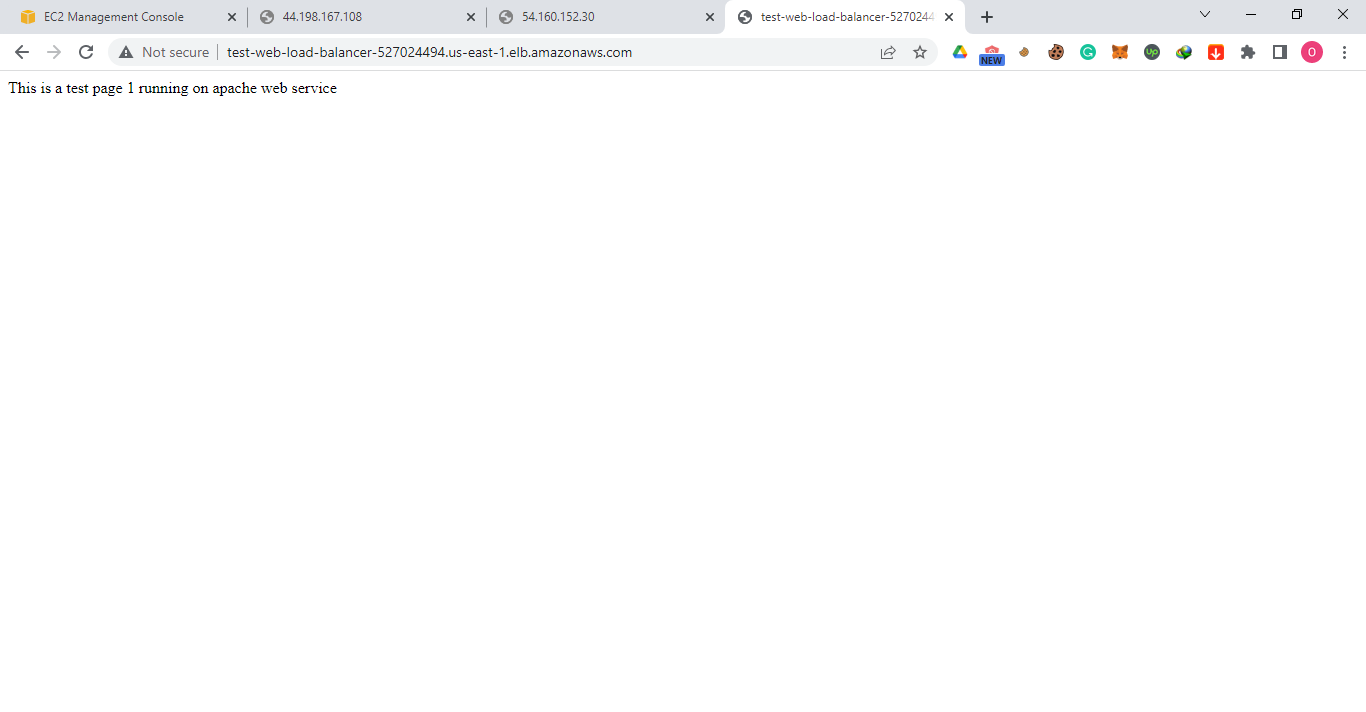
echo "This is a test page 1 running on apache web service" > index.html
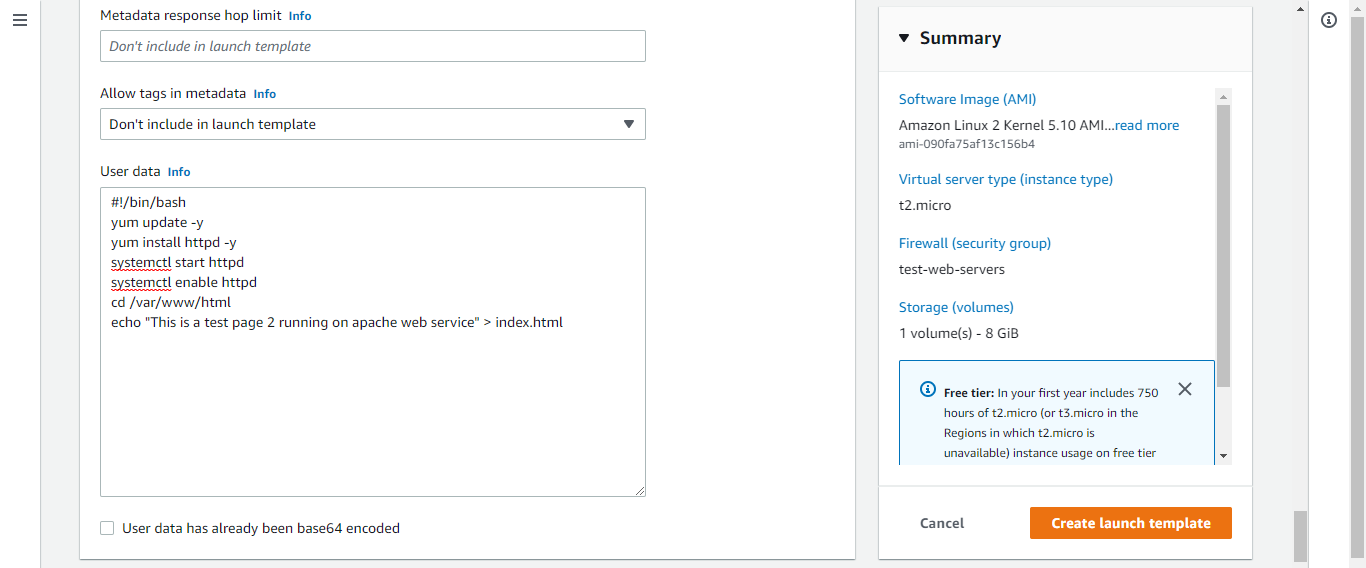
Finally, click on create launch template. Now our launch template is ready. Time to create our auto-scaling group.
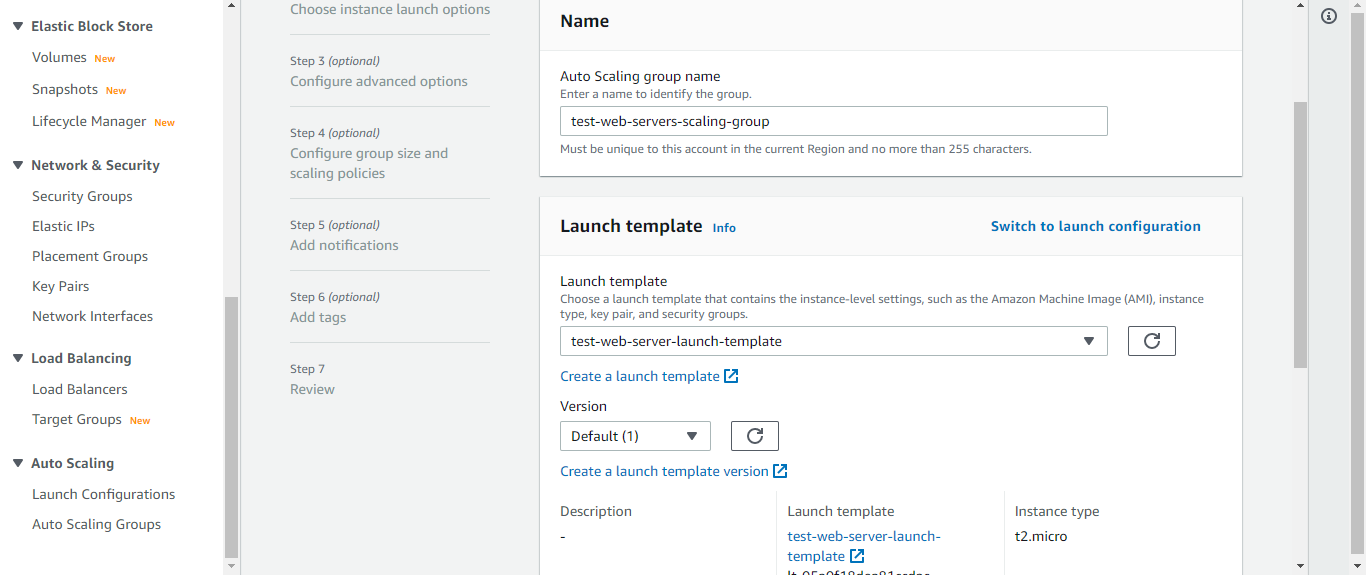
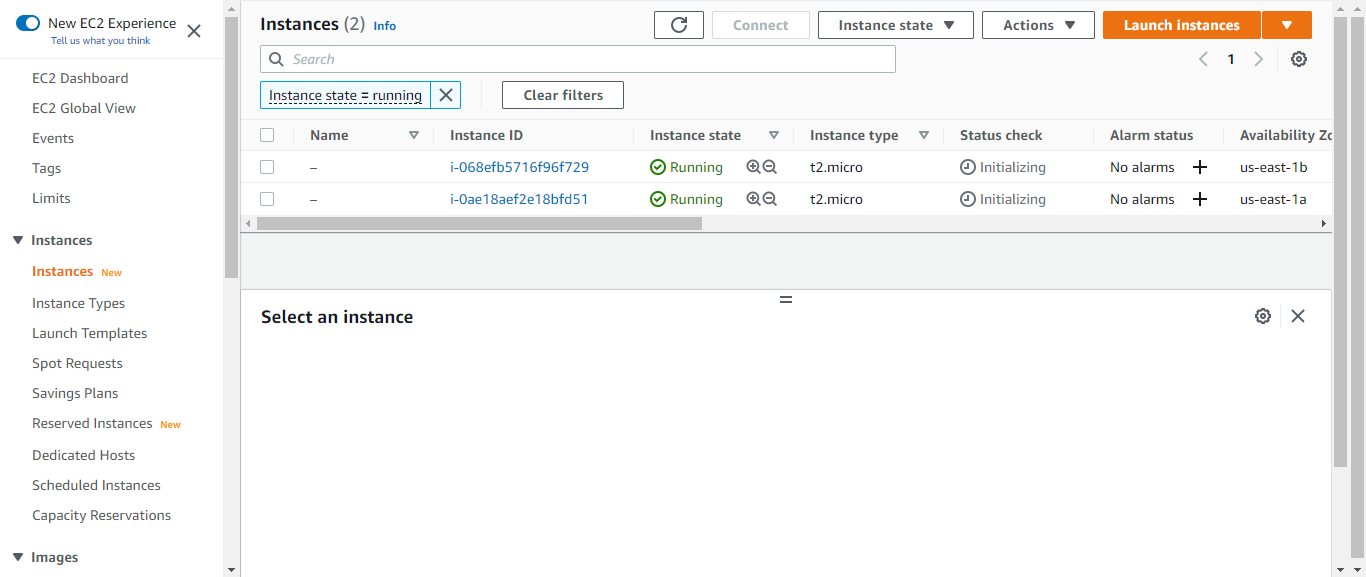
While still on the EC2 dashboard, click on Auto Scaling Groups. Click on Create auto scaling group. We will give it a name and select the launch template we created. Click next, select the VPC for this project, and select the two public subnets for this tier. Click on next, click on attach to an existing load balancer, and select choose from your load balancer target groups. Enter the desired, minimum, and maximum capacity. Finally, click on the target tracking scaling policy in the scaling policies section and leave everything else as default.
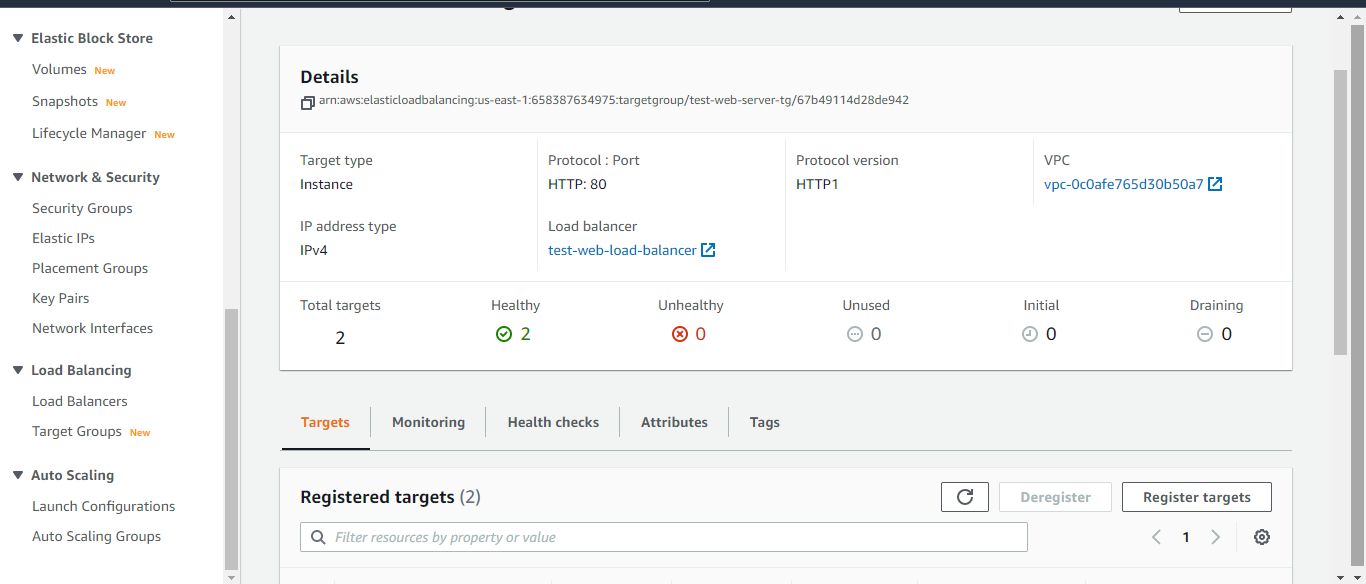
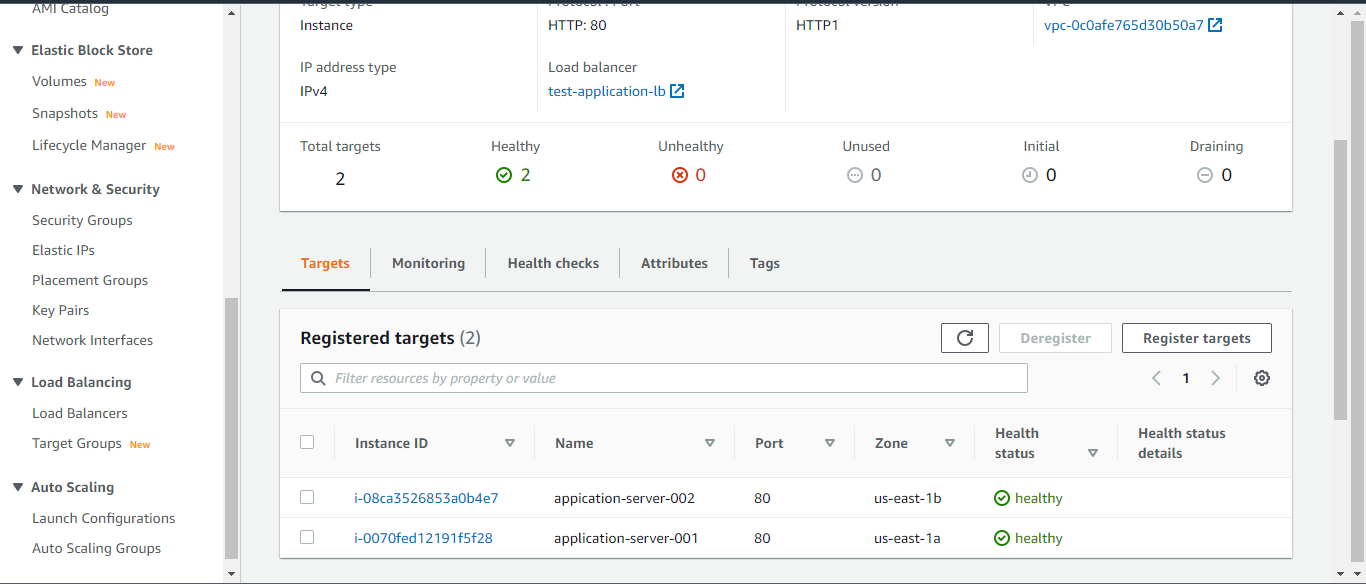
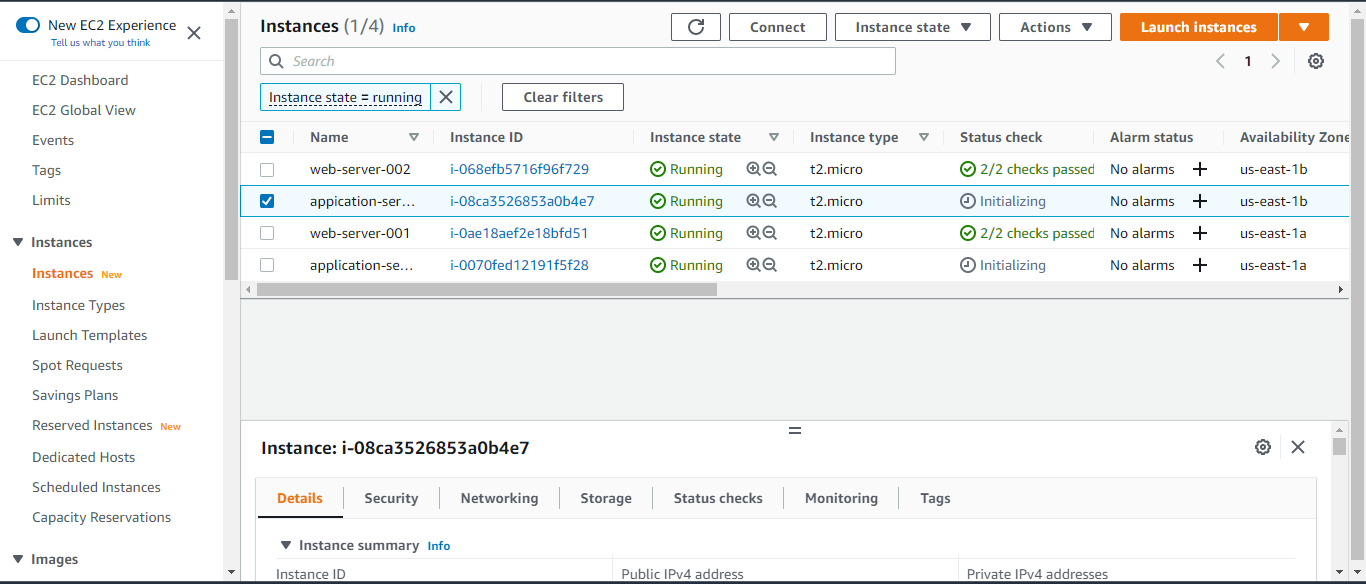
To check if everything is working, click on instances, two instances should now be booting up. Click on the load balancer, copy the DNS address and paste it into your browser; we should see our web servers up and running. Click on the target groups; there should be two healthy target groups.
Note that we cannot access our servers with the public address of our EC2 instances. Remember, our instances do not accept HTTP traffic from the public, only from the load balancer.

Application Tier
Let's build our application tier. We need two private subnets for our application tier. These private subnets will house our application servers and must be provisioned in different availability zones.
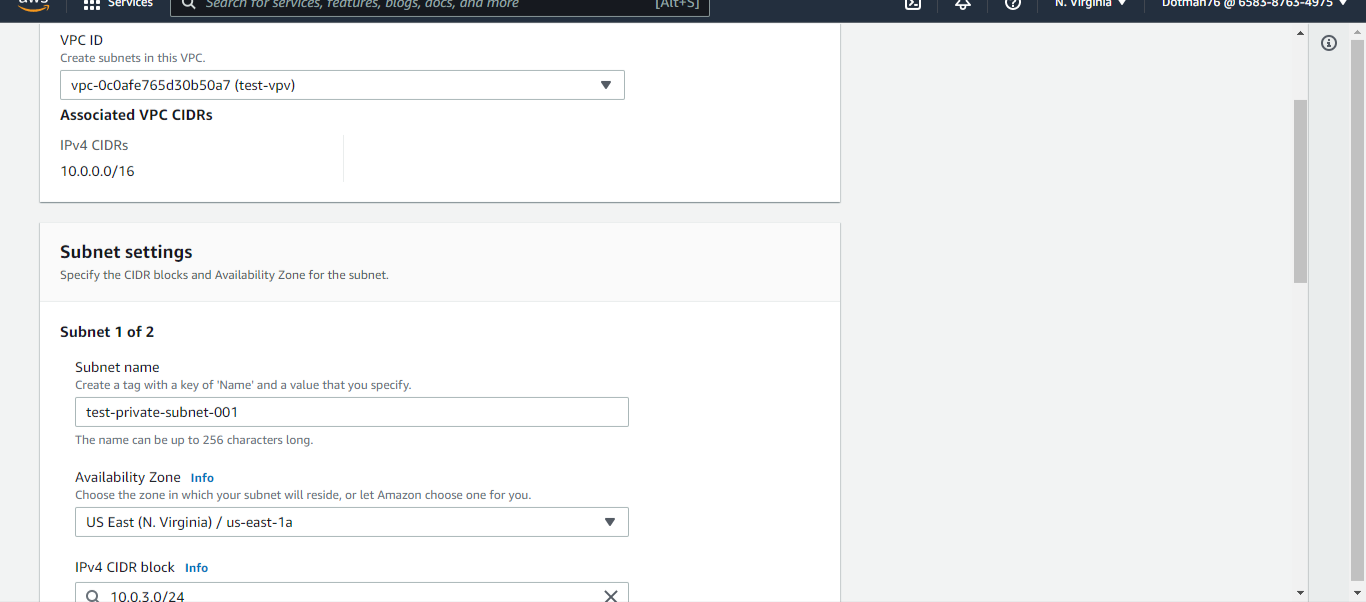
On the AWS dashboard, we will click on VPC and navigate to Subnets. These subnets will be created in the VPC for this project. Click on Create subnet, give it a name, choose availability zone, and assign a CIDR address of 10.0.3.0/24.
Repeat this process to create the second private subnet. Give it another name, choose another different availability zone, and assign a CIDR address of 10.0.4.0/24.
Since we are creating private subnets, there is no need to enable auto-assign public Ipv4 addresses.
Route Tables To be precise, we also need to create route tables for our application. While still on the VPC dashboard, navigate to the left side of the console and click on the Route table. Select Create route table, give it a name, choose the VPC for this project, and hit the create button. Repeat this process to create the second route table.
Next, we will associate the route tables with our two private subnets. Click on the route table, edit the subnet association, and select the private subnet. Repeat this process for the second route table and associate the second private subnet.
We need to edit the route. On the route tab of our route table, we will click on edit routes. We are setting up the table to reach the NAT gateways this time. Remember the NAT gateways we created in the public subnets? The destination will be 0.0.0.0/0, and the target will be our NAT gateway.

Repeat this process for the second route table and associate the second NAT gateway.
Security Groups
For this tier, we also need two security groups – one for application load balancers and the other for the application servers. The load balancer security group will only allow HTTP traffic from the web servers. While the application servers’ security group will only allow HTTP traffic from the load balancer.
On the AWS dashboard, click on EC2. On the left side of the console, click on security groups. Select create a security group. Give it a name, description, and select the VPC for this project. In the inbound rule section, click on add rule. Select HTTP as the type and the security group ID of your web servers as the source. We are all set for the load balancer security group.
Repeat this process for the application servers’ security group. But, select custom as the source and enter the security group ID of your application load balancer.
Load Balancer
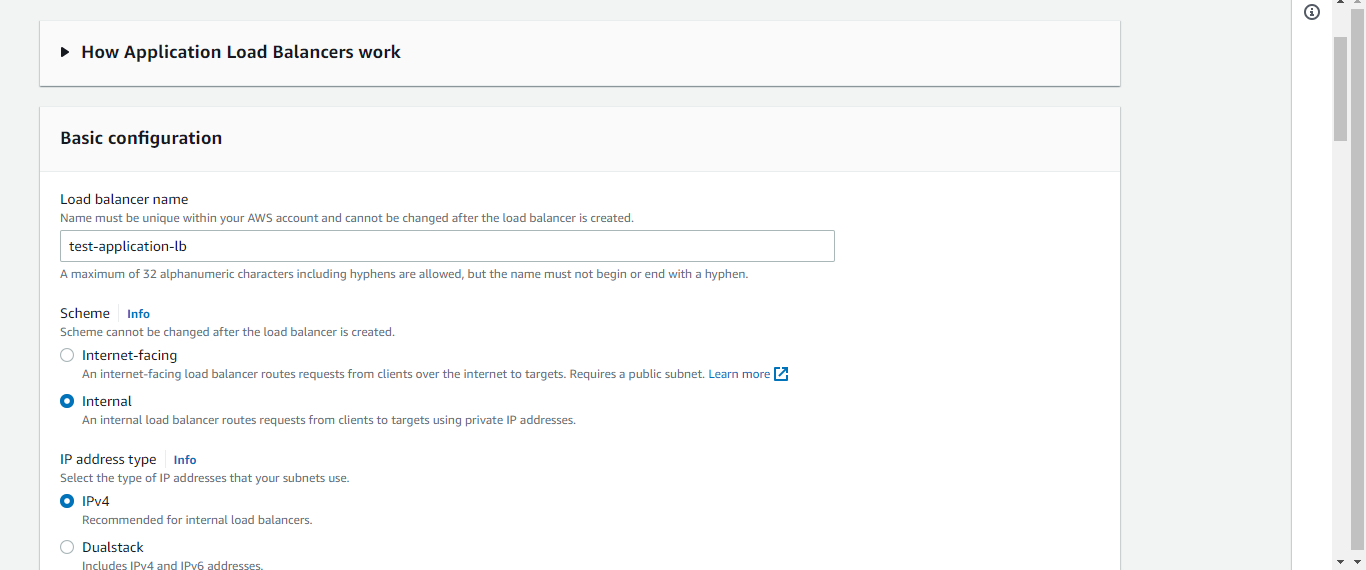
The next on the list is the load balancer. While still on the EC2 dashboard, we will click on Load balancers on the left side of our console. Click on Create load balancer. We will choose the application load balancer (ALB). We will give it a name and select internal as the scheme (we don't want it to be internet-facing). Choose the VPC for this project. Then, we will choose our two availability zones and select the private subnets we created.
We will click next and select the security group we created for our application load balancer. We need to select a target group in the listeners and routing section. So, we will need to create a target group for this tier. Click on create target group, choose instances as the target type, give it a name and select the VPC for this project. Leave every other thing as default, click on next, and click on create target group.
Back to the create ALB tab, refresh the target group section alone, and select the target group we just created. Leave every other thing as default and click on create the load balancer.
Auto Scaling Group
We need to set up an auto-scaling group for our application tier.
We need to create a launch template. While still on the EC2 dashboard, click on the launch template. Then click on create launch template. Choose your AMI, instance type, and key pair (create a new one if you don't have one). We will give our launch template a name and tick to provide auto-scaling guidance.
In the network section, click on select existing security group, and choose the security group we created for our application servers. Click on advanced details, scroll down to user data, and paste the following script. We will use the same script as our web servers for this project.
yum update -y
yum install httpd -y
systemctl start httpd
systemctl enable httpd
cd /var/www/HTML
echo "This is a test page 345 running on apache web service" > index.html
Click on create launch template. Now our launch template is ready. Time to create our auto-scaling group.
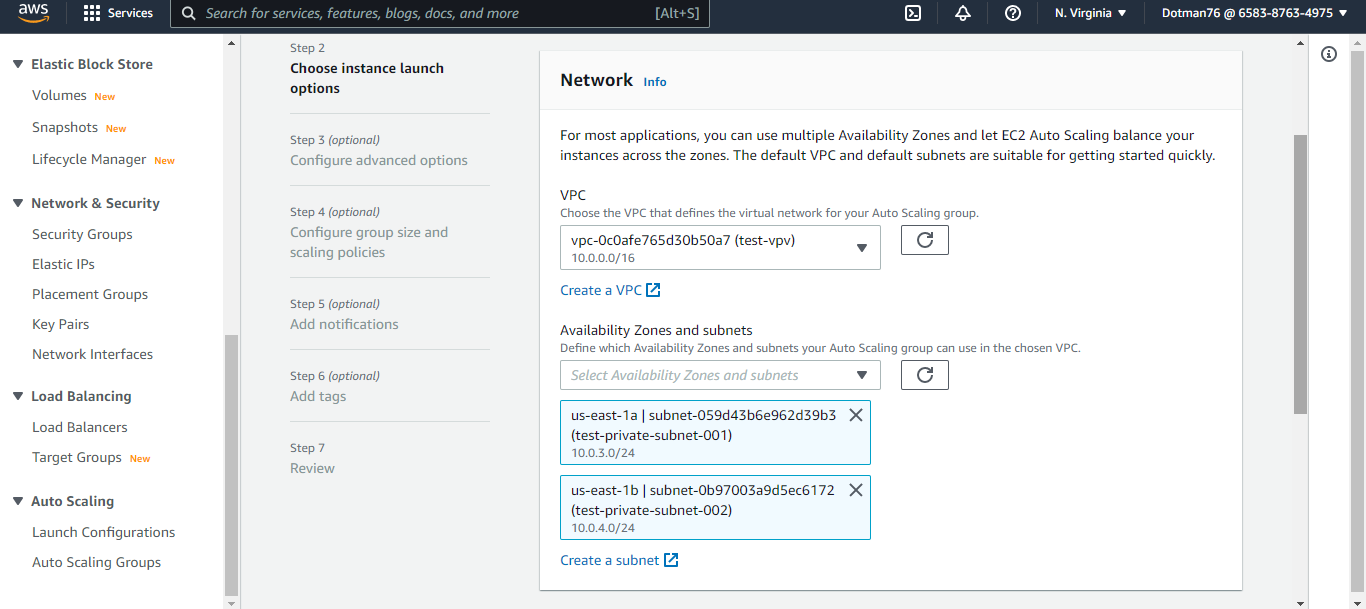
While still on the EC2 dashboard, click on the Autoscaling group. Click on Create auto scaling group. We will give it a name and select the launch template we created. Click next, select the VPC for this project, and select the two private subnets for this tier. Click on next, click on attach to an existing load balancer, and select choose from your load balancer target groups. Enter the desired, minimum, and maximum capacity.
Finally, click on the target tracking scaling policy in the scaling policies section and leave everything else as default.
Database Tier
This is the last tier of our architecture. This tier stores and manages information processed by the application tier.
Subnets
For this tier, we need another two private subnets.
On the AWS dashboard, we will click on VPC, and navigate to Subnets. These subnets will be created in the VPC for this project. Create a subnet, give it a name, choose the availability zone, and assign a CIDR address of 10.0.5.0/24.
Repeat this process to create the second private subnet. Give it another name, choose another different availability zone, and assign a CIDR address of 10.0.6.0/24. Since we are creating private subnets, there is no need to enable auto-assign public Ipv4 addresses.
Security Group
For this tier, we need one security group. The security group will only allow MySQL/Aurora traffic from the application servers.
On the AWS dashboard, click on EC2. On the left side of the console, click on Security groups. Select Create security group. Give it a name, description, and select the VPC for this project. In the inbound rule section, click on add rule. Select MySQL/Aurora as the type and security group ID of your application servers as the source. We are all set for the database security group.
Relational Database Service (RDS)
For this project, we will use RDS as our database. It is a collection of managed services that makes it simple to set up, operate, and scale databases in the cloud.
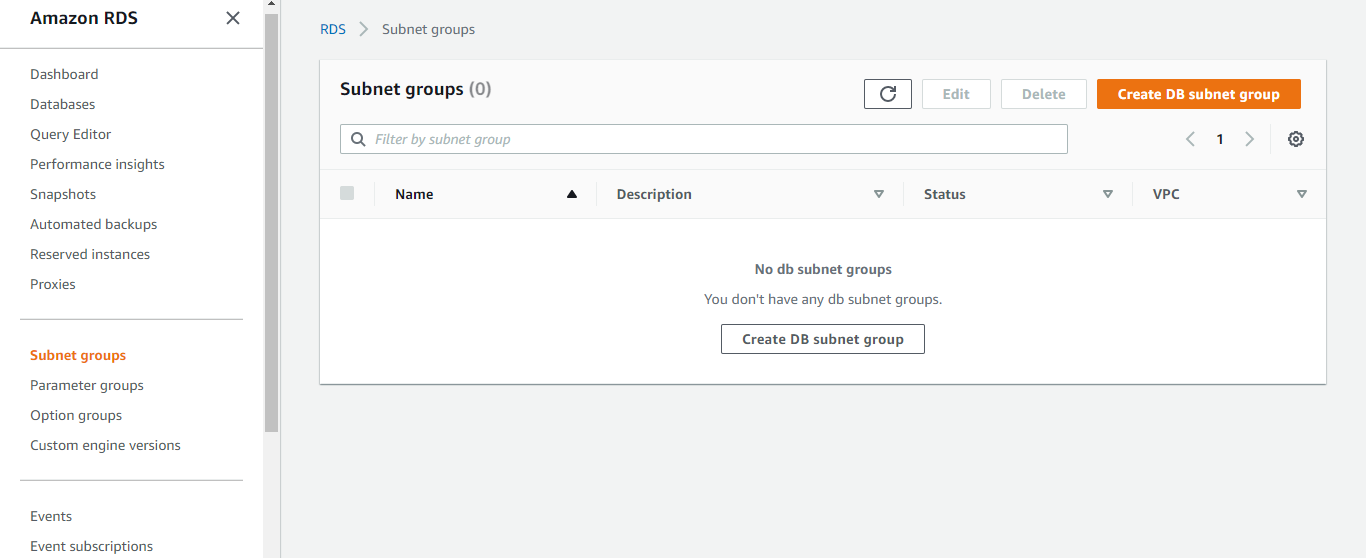
Locate RDS on the AWS dashboard. On the left-hand side of the console, click on Subnet groups. A database subnet group is essential to creating a database. Click on create DB subnet. Give it a name, and description, select our custom VPC, choose availability zones and our private subnets, and hit the create button.
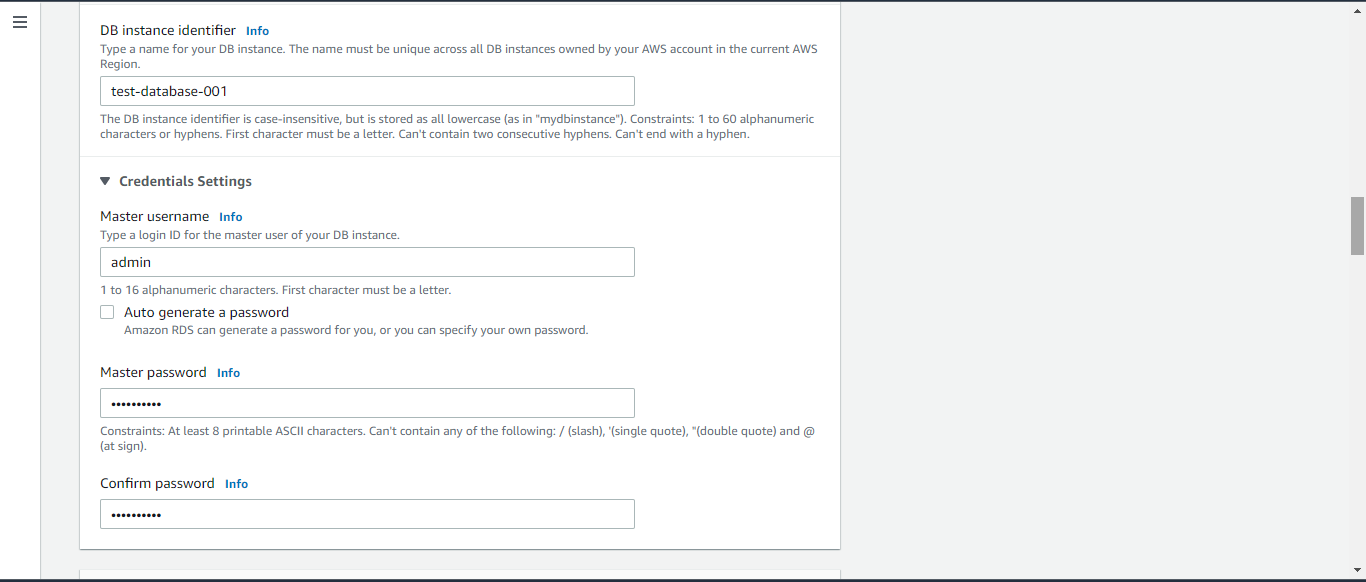
Now, we can create our database. Click on Create database. Choose a standard to create and select MySQL as the engine option. We will use the free tier template for this project purpose. Give it an instance identifier, and set up a master username and password. We will then choose our custom VPC, the DB subnet group we created, and the security group we made for our database. And leave everything else as default.

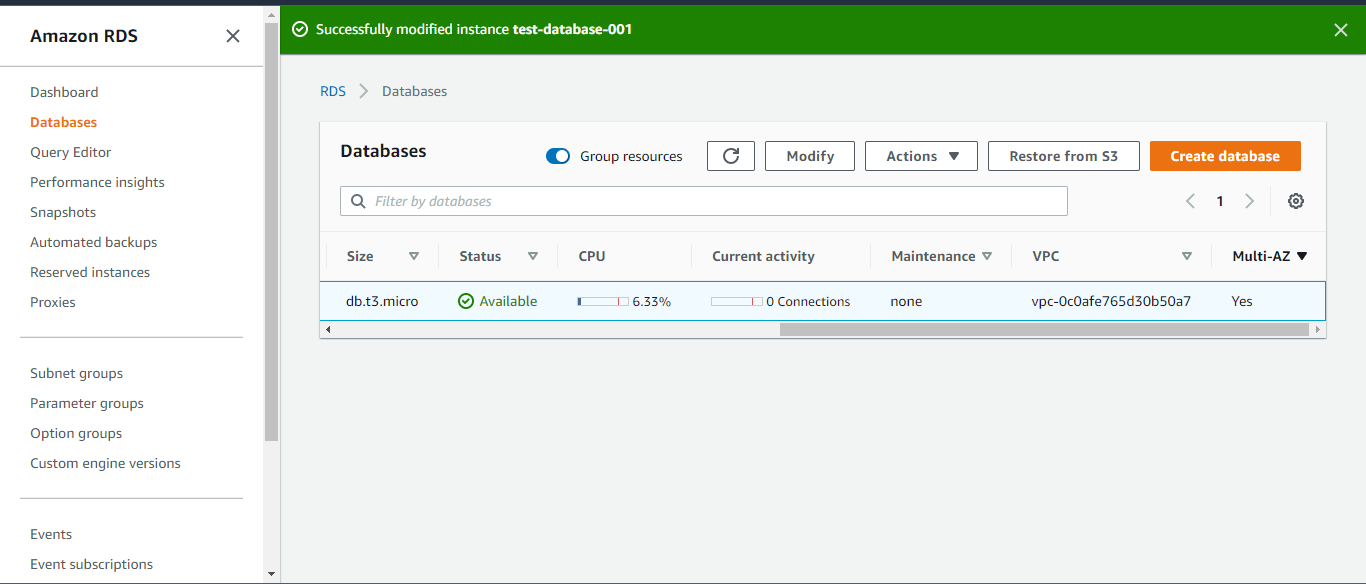
We have just successfully built our architecture.


