Complete Agile Planning with ZenHub

Hey there! I'm a DevOps engineer, and I absolutely love what I do. I'm passionate about working with code and making sure everything is running smoothly. But I also have a real flair for writing. I want to make technical information more accessible to beginners, and help people feel confident using technology. That's why I've decided to combine my two passions and start writing about tech.
I'll be sharing tips, tricks and tutorials on everything from coding to cloud computing. So if you're new to the world of tech, or just want to learn more about what goes on behind the scenes, be sure to check out my blog.
ZenHub is a project management tool that helps you plan and execute agile development projects. It's simple to use, and getting started is quick and easy.
ZenHub is based on the Kanban framework, and it provides you with an overview of your project so you can see what's been done, what's in progress, and what's left to do. You can also use it to create and manage your backlog, sprints, and tasks.
It also has a number of features that make it unique, such as its ability to connect to GitHub and its use of Issues and Boards.
We will use ZenHub to create a comprehensive agile plan for this project. We'll write user stories, develop and refine the product backlog, construct a sprint plan, and move stories around the ZenHub board. Lastly, we'll set up a burndown chart and prepare for the next Sprint.
This project is about to get a lot more comprehensive! We'll work with a simple scenario and play the roles of product owner, scrum master, and developer - all working in a scrum and agile team.
The Scenario
Your team (New Age Team) is responsible for developing the backend product catalog for an e-commerce website. The stakeholders require the ability to create, retrieve, update, and delete products from the catalog. They have also asked for customers to be able to "like" a product and have the site show the like count on the product page. In addition to the catalog functionality, they have requested that it should be hosted in a cloud environment with automated deployments.
Now that we have defined the scenario let's get started on the solution!
Must-have
• GitHub account. Learn how to create a GitHub account here
• ZenHub account. Learn how to create a ZenHub account here
• Finally, link the created ZenHub and GitHub accounts. Learn how to link ZenHub with a GitHub account here
Stakeholder Requirements
The first thing we'll do is extract the stakeholders' requirements from the given scenario. We have to do this so we can create our user stories from the requirements. The following requirements can be extracted from the scenario:
- Need the ability to create a product in the catalog.
- Need the ability to retrieve a product from the catalog.
- Need the ability to update a product in the catalog.
- Need the ability to delete a product from the catalog.
- Need the ability to "Like" a product in the catalog.
- Need the ability to "Dislike" a product in the catalog.
- Need the ability to list all products in the catalog.
- Need the ability to query a subset of products in the catalog.
- Must be hosted in the cloud.
- Must have automation to deploy new changes to the cloud.
New Repository
The next step is creating a new repository on GitHub for our project. Here are the steps we will take to create the repository:
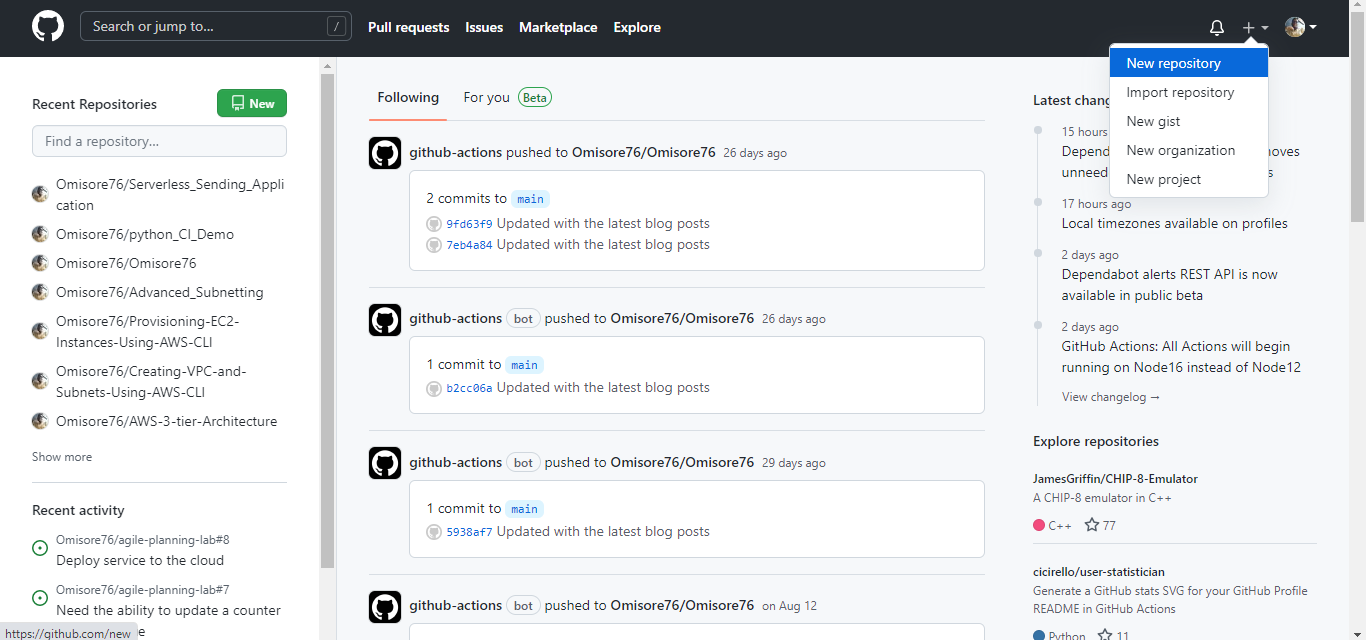
• We will Log into your GitHub account
• At the top right corner, we will hit the plus button and click on "New repository."
• We will give the repository a name and some description, make sure it is set to public, and tick the “Add a Readme file” box.
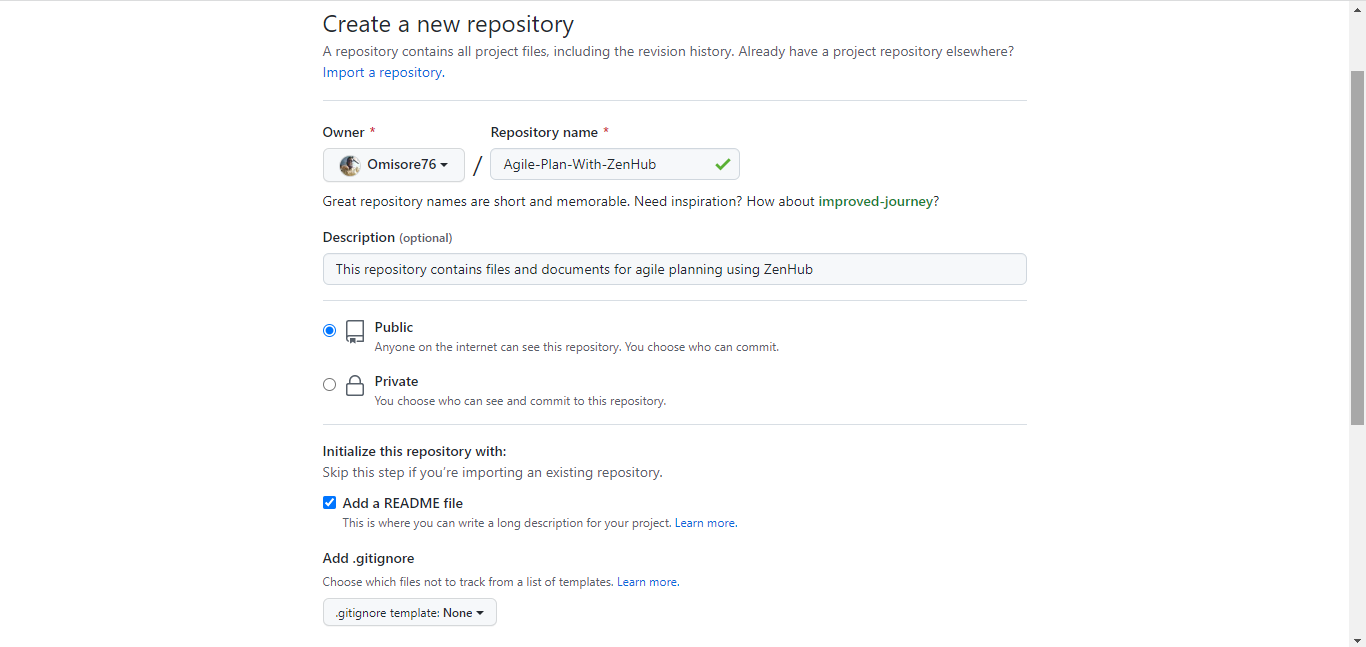
• Finally, we will hit the create button

And that’s it! Our project repo has been created!
ZenHub Workspace
Now, we will create a new workspace on ZenHub for our project:
• Log into your ZenHub account
• Click on "Create new workspace."
• Give our workspace a name, and some description
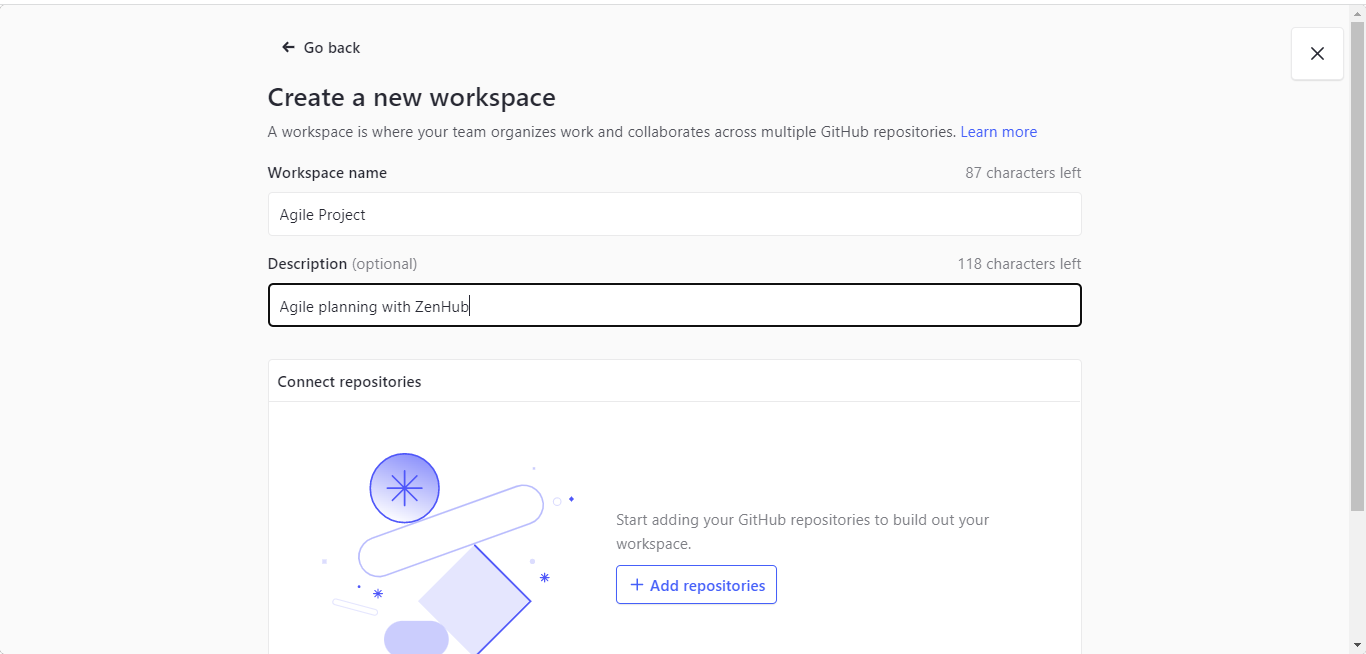
• Click on “Add repositories” and select the repository we created for this project
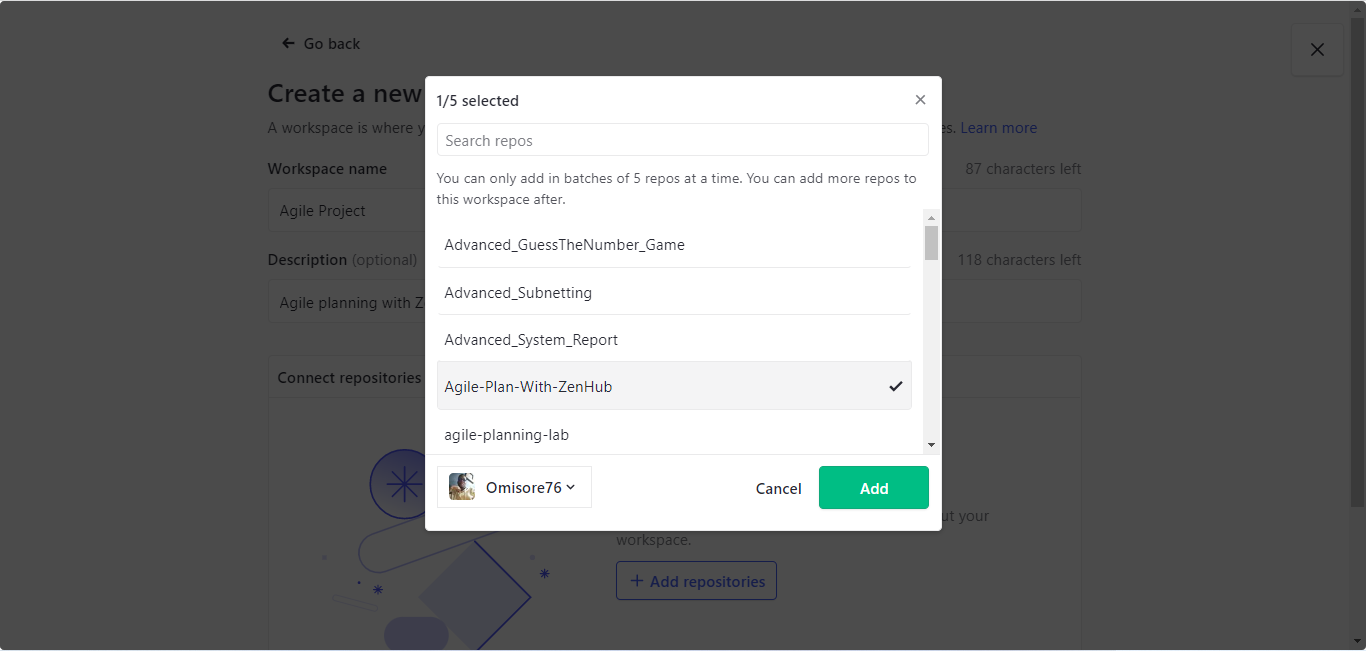
• Click the Create workspace button
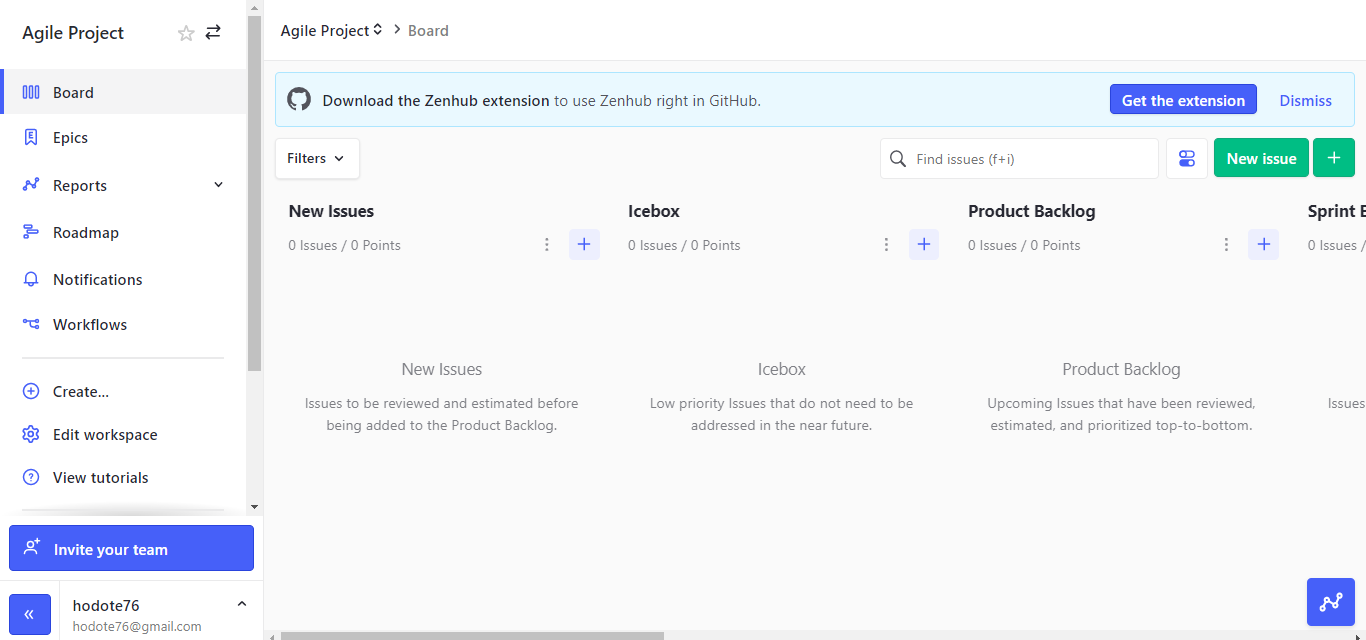
There, our workspace is ready!
Issue Template
In the most basic sense, an issue template lets you pre-fill a new issue with template text. This is the next thing we'll create on GitHub.
We'll:
• Select the repo for this project on GitHub
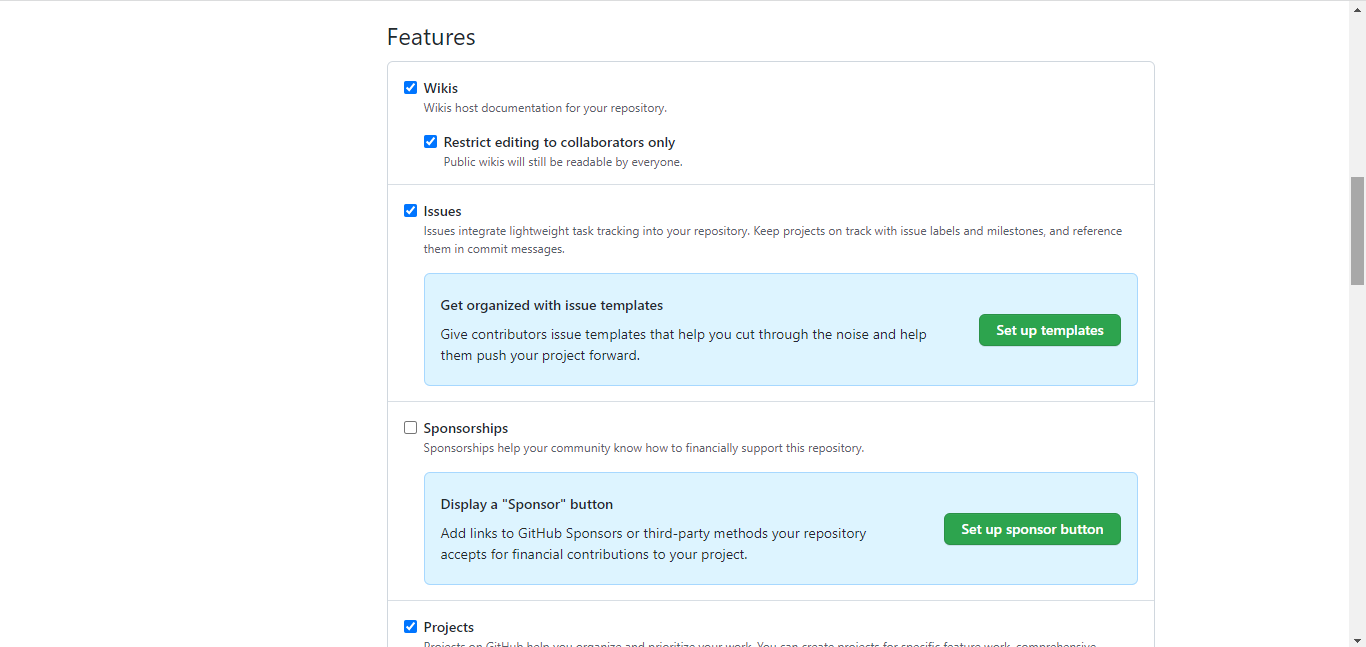
• Switch to the settings tab
• Scroll down to "features" and click on "set up templates."
• Click on "add template" and select "custom template."
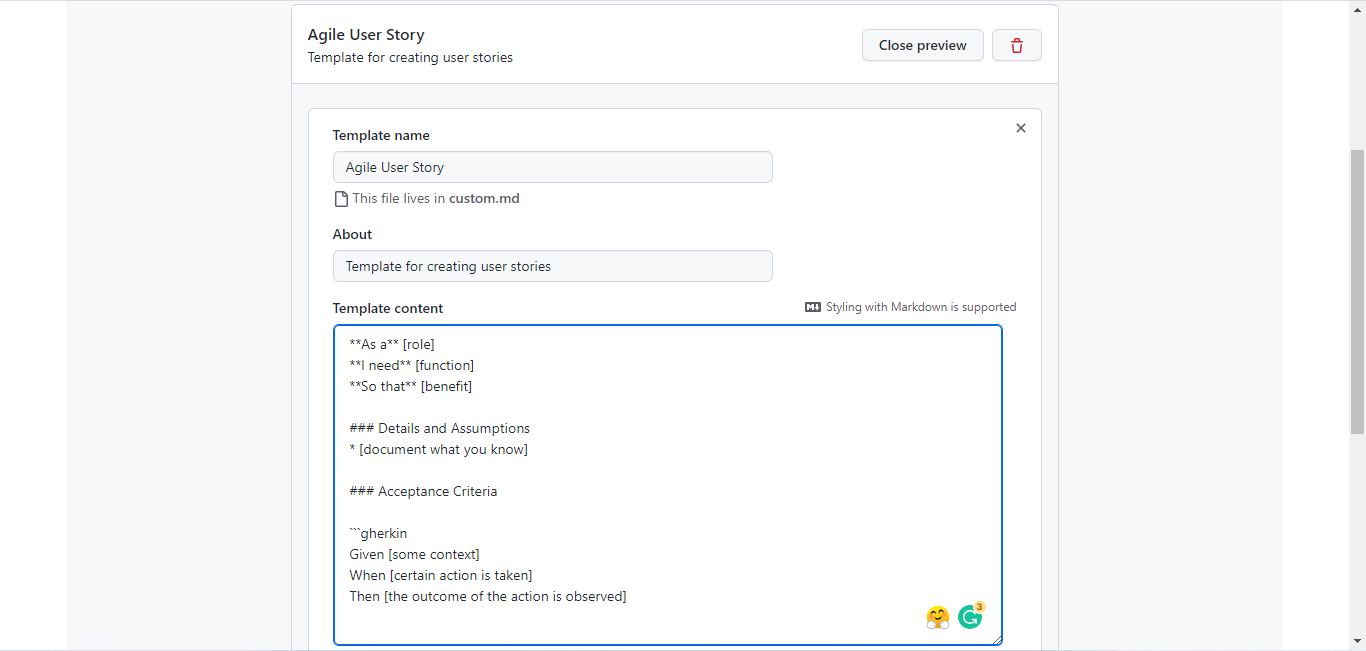
• Click on preview and edit template content
• Give the template a name and some description, and paste the code block below as the template content
• Then click on the "propose changes" button
• And finally, commit your changes

**As a** [role]
**I need** [function]
**So that** [benefit]

### Details and Assumptions
* [document what you know]

### Acceptance Criteria
```gherkin
Given [some context]
When [certain action is taken]
Then [the outcome of action is observed]
Don't worry if the contents of our issue template look complex at first. We will quickly go through them now.
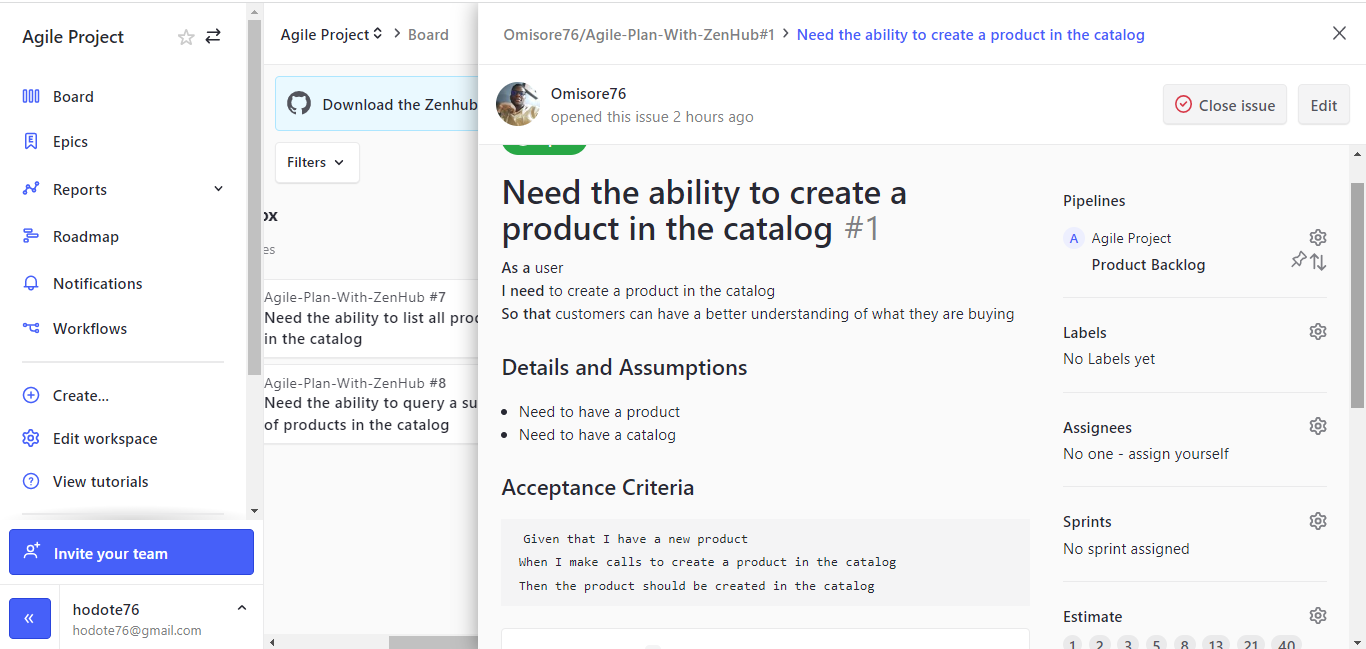
We specify who the service is for in the first line of the issue template. For example, the service can be for customers, the cloud administrator, and more. The second statement allows us to define the amazing service or function that we need. The third line is about the benefits of the service we discussed in line 2!
In the details and assumptions section, we will define everything we know about the service to be created and all the assumptions that could help us bring the service to reality.
The acceptance criteria are a set of predefined requirements that must be met to mark a user story as complete. We will use the gherkin syntax to define our acceptance criteria.
Gherkin syntax has a few special keywords that are used to give structure to a file. Each keyword is used for a specific purpose and has a specific meaning. The keywords are:
- Given - Used to describe the initial state of the system under test
- When - Used to describe an event or action that triggers a change in the system
- Then - Used to describe the expected result of the event or action
- And - Used to combine multiple Given, When, or Then steps into a single step
Now that we understand the issue template let's continue.
Issues Pipeline
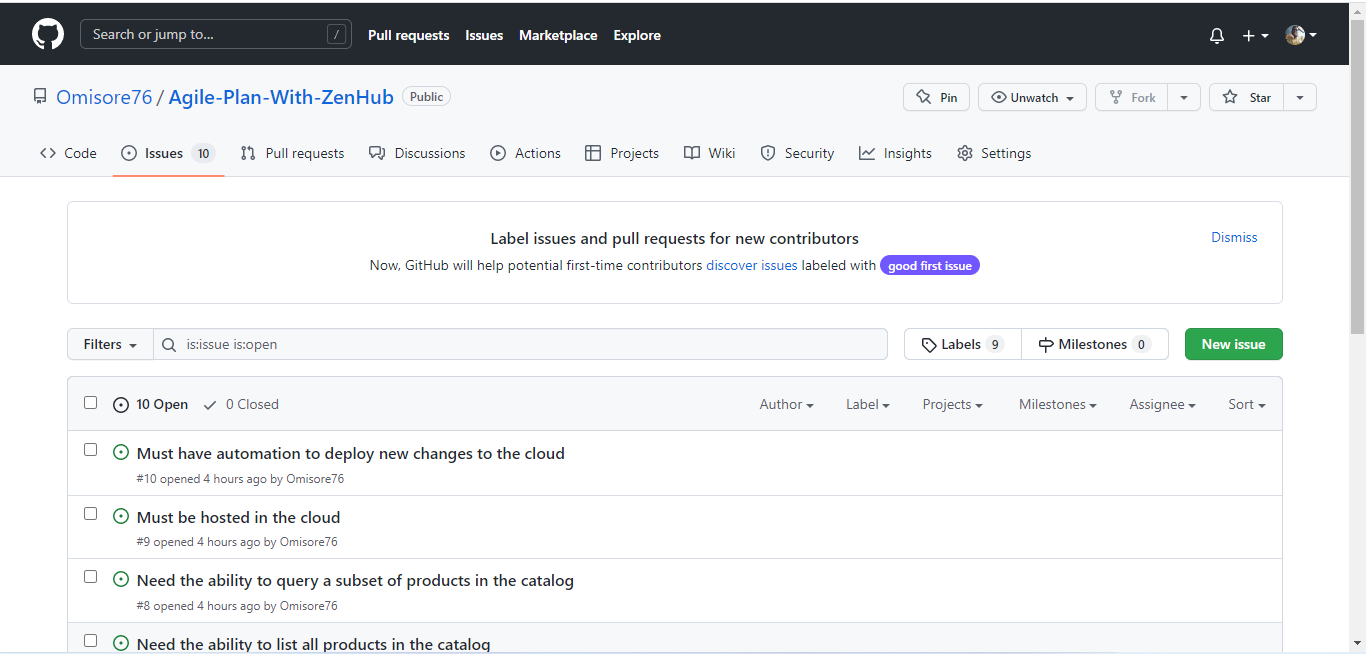
Now, we will develop issue statements from the requirements we extracted from the given scenario.
- For this project, we will click "New issue" in the top right corner of our ZenHub workspace.

- Then, we will select the issue template we created earlier from the drop-down menu.
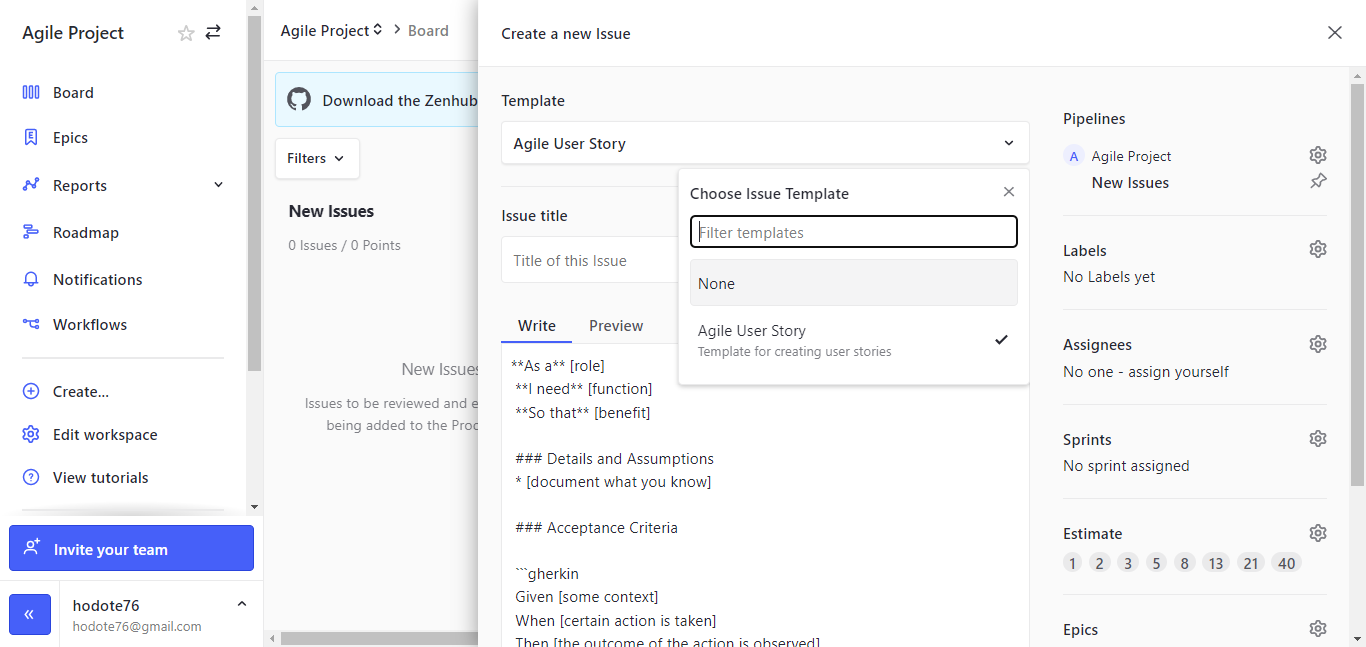
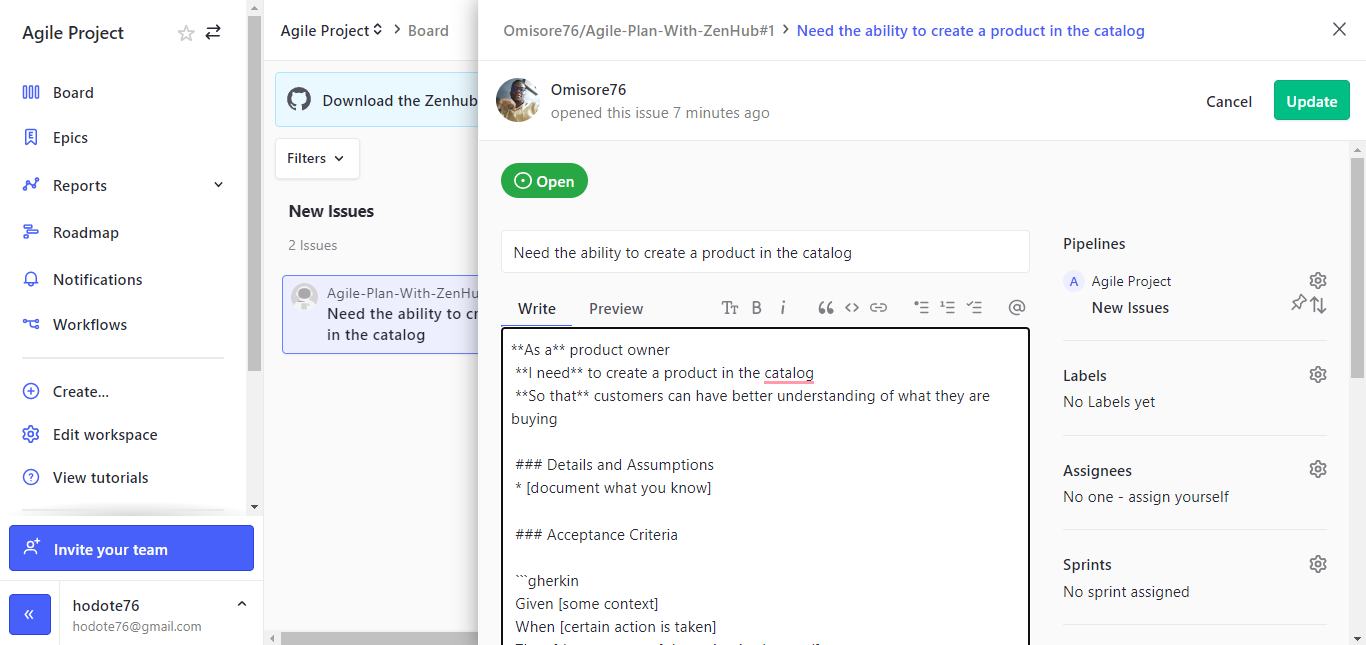
- We'll develop the first section of our issue template for the first requirement. In other words, we'll edit the role, function, and benefit. It should look like the image below when we're done. Then click the "submit new issue" button.
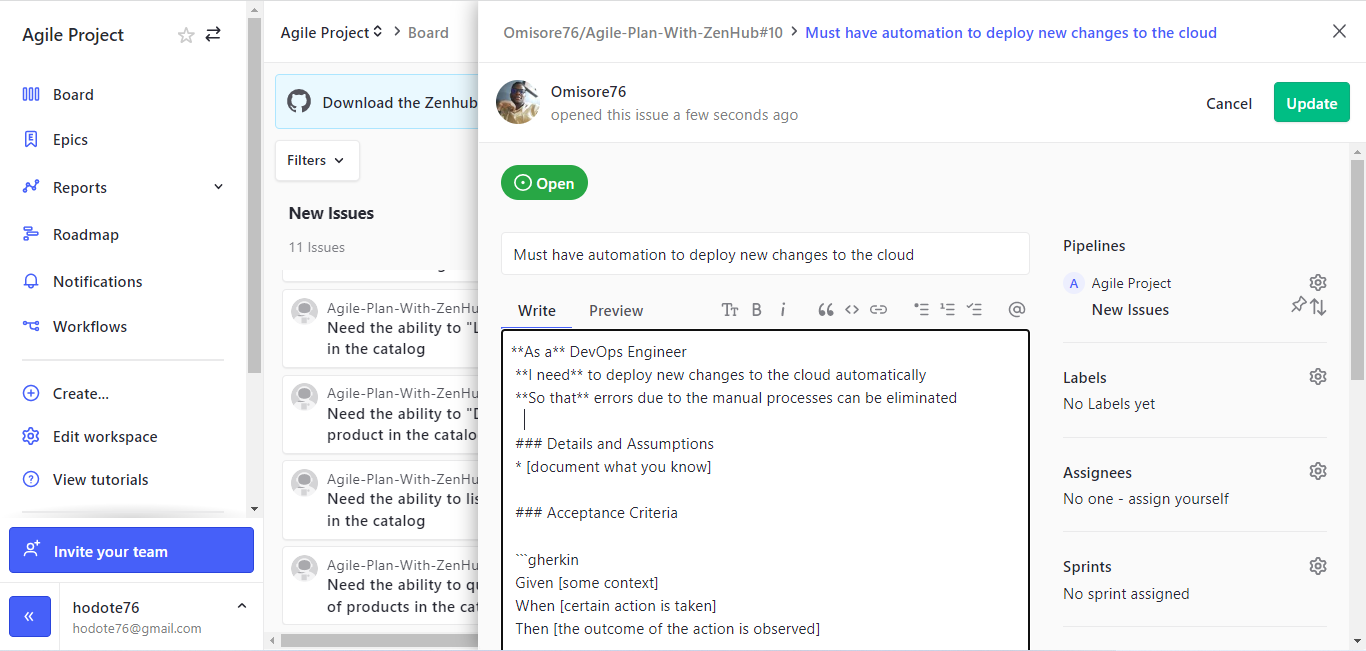
- Repeat steps 1 - 4 for every requirement. In the end, the "New Issues" pipeline should look like the image below.
User Stories Refinement
The next step is refining our user stories. We will assume we have a better understanding of what our users want and need. Also, we will assume we have conducted user research and gathered feedback about what they like and don't like.
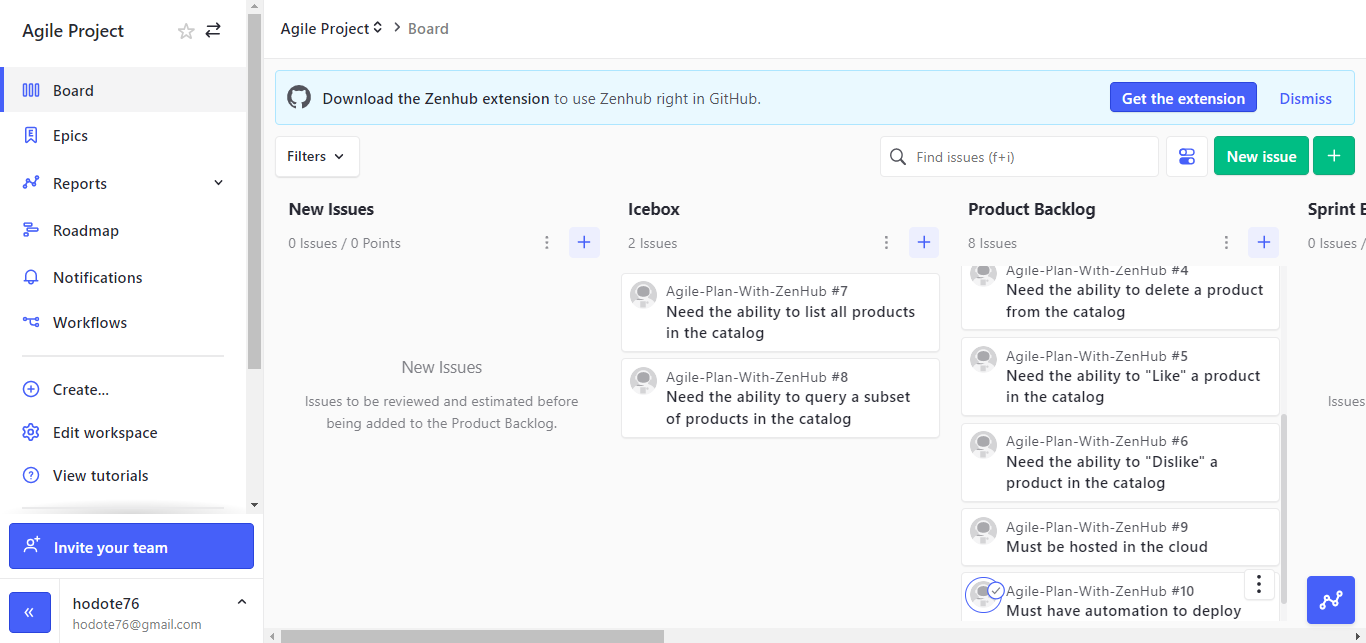
We will start by moving the issues corresponding to requirements 7 and 8 into the "Icebox" pipeline. We are assuming they are low-priority issues, and we will revisit them at a later time.
After that, we will move the leftover issues into the “product backlog” pipeline. In the end, your dashboard will look like the image below.
- For the sake of this project, we will assume that we have already held the “backlog refinement” meeting. And our user stories are ranked in the following order: 1, 2, 3, 4, 9, 10, 5, & 6.
Product Backlog Refinement
This adds more detail and clarity to the user stories in the product backlog. Now, we will enhance our user stories in the product backlog by adding “Details and Assumptions" and “Acceptance Criteria.” For this project, we will only be revising the top 5 stories in our product backlog pipeline
We'll Click on the first story in the “Product Backlog.”
Click on edit.
Update the Acceptance Criteria and Details and Assumptions sections.
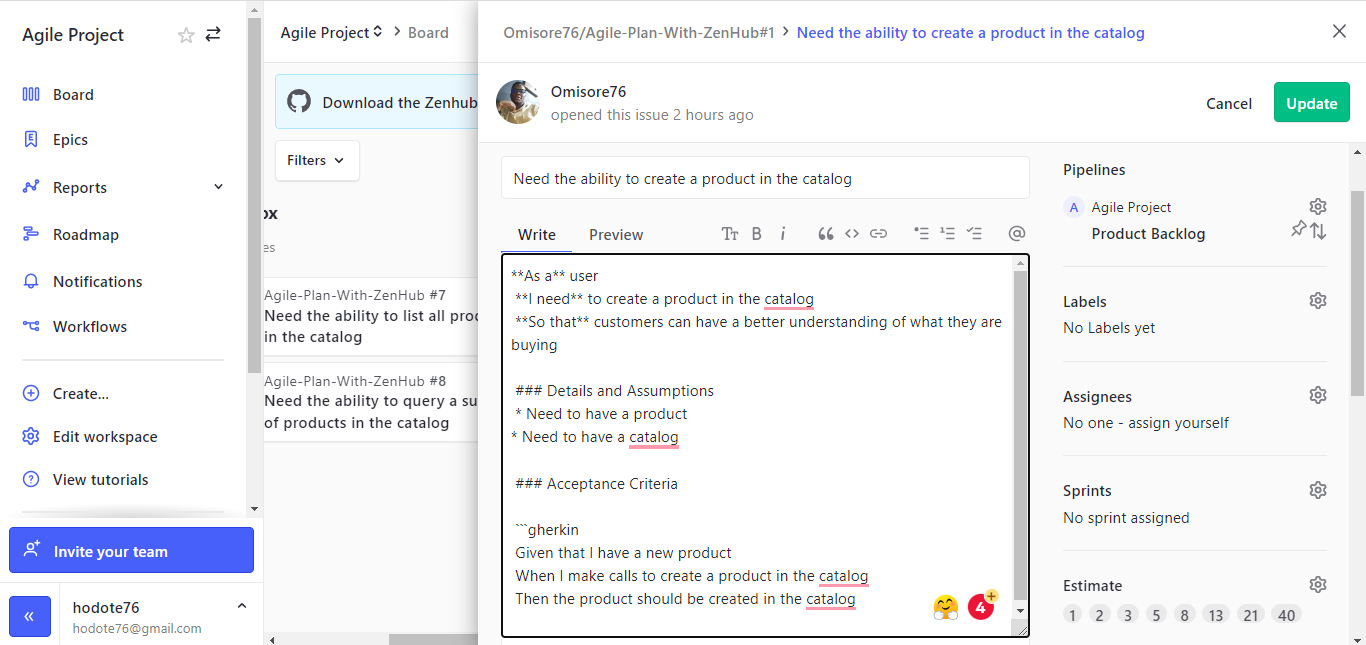
- Then click on update.
- We'll repeat these steps for the other top stories.
GitHub Label
A GitHub label is a tag applied to issues and pull requests in a GitHub repository. Labels are used to categorize and filter issues and pull requests.
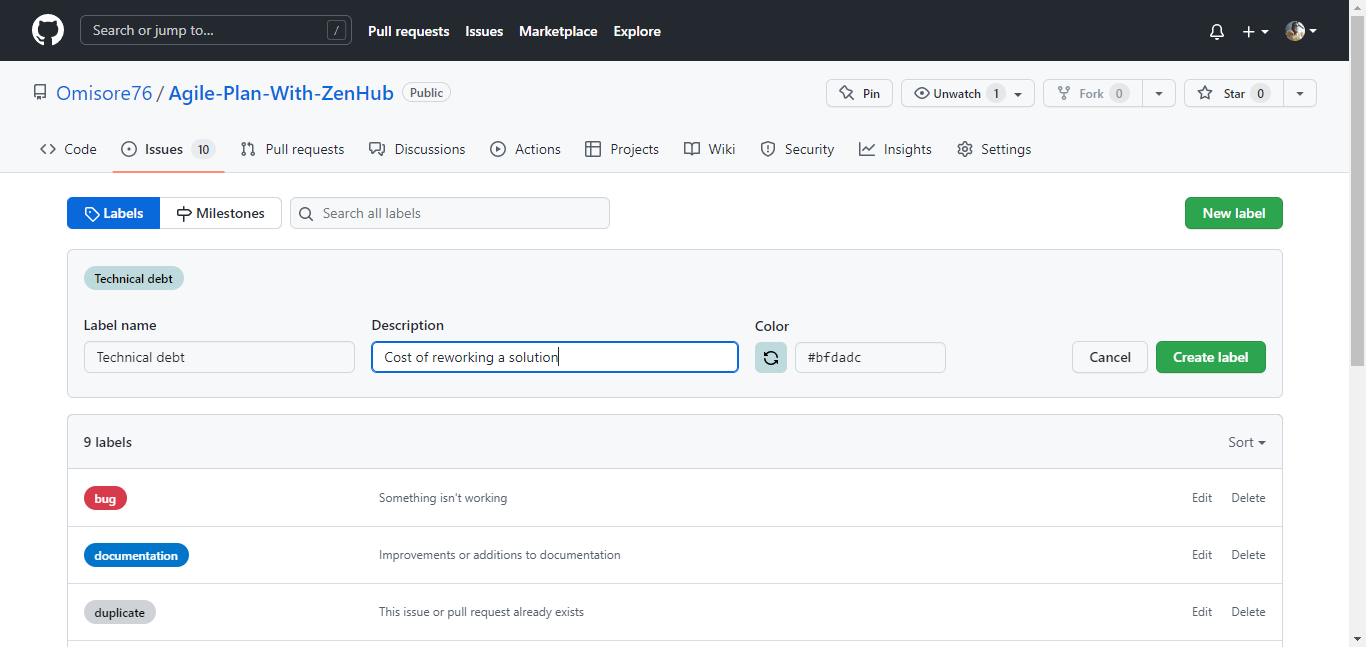
Repositories come with default labels. But we will be adding an additional one named "technical debt." This will help us identify and track technical debt within our repositories. Technical debt is any code that is not optimal and needs to be refactored or rewritten.
Go to the repository for this project
Click on 'Issues'
Then click on 'Labels'
We will now create a new label called 'Technical Debts.'
Click on 'New Label'. Name it and give it a description.
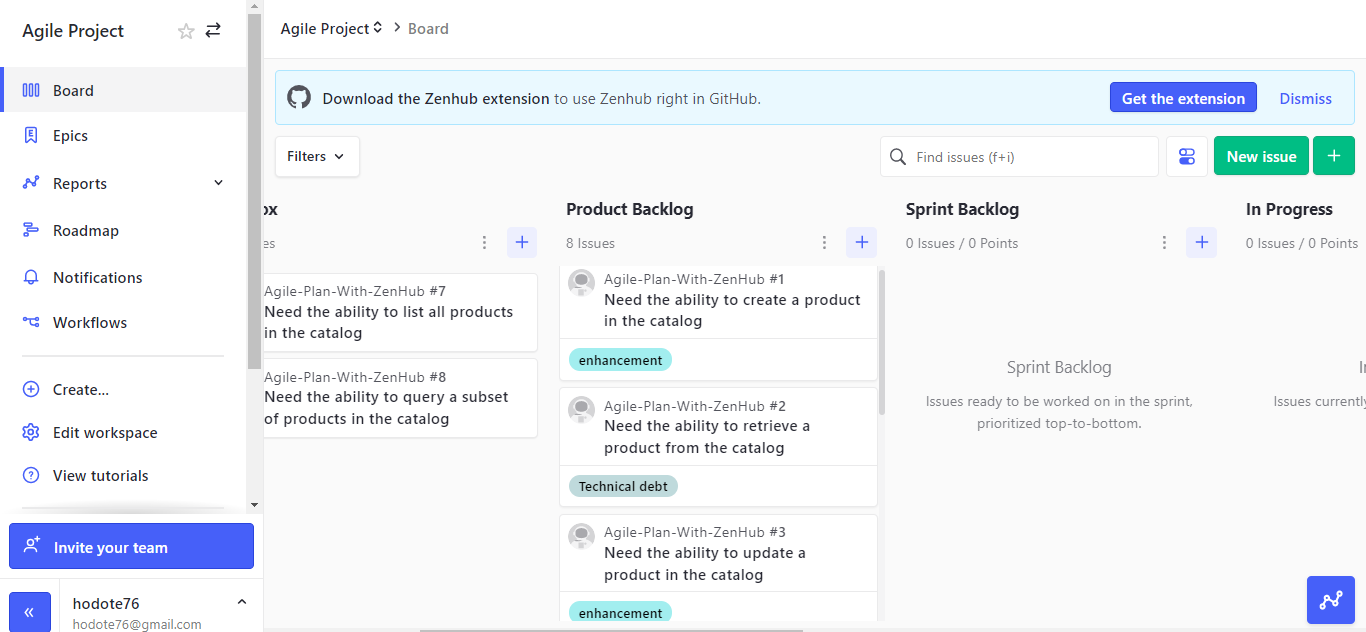
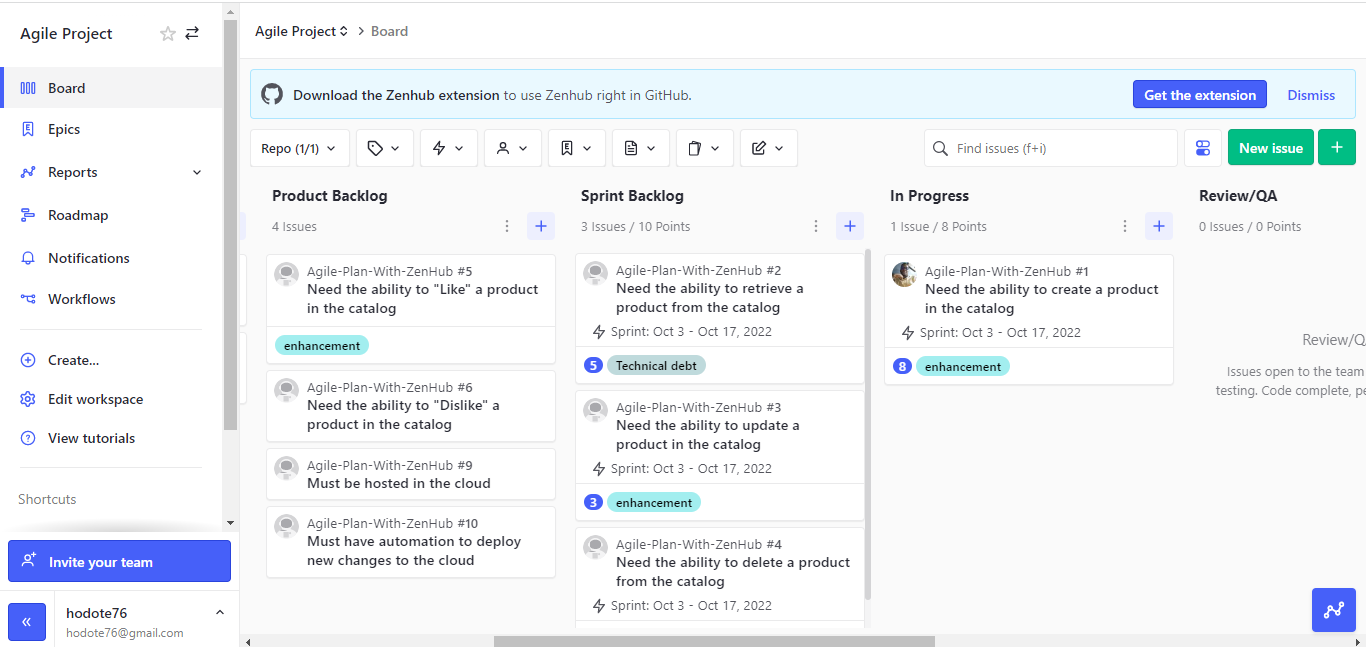
After that, we'll add the correct labels to the user stories in the product backlog. For this project, we'll only use enhancement or technical debt labels. To do this, we will:
Click on the first story on the ZenHub board.
Click on 'labels' and select 'enhancement'.
We will repeat these steps for the first five, assigning either the 'technical debt' or 'enhancement' labels.
Our board should look like the image below when we're finished.
Sprint Milestone
A sprint milestone is a marker of progress in a software development project delivered at the end of a sprint. We will create a two-week milestone for our project.
- On the ZenHub board, click on the plus sign (+).
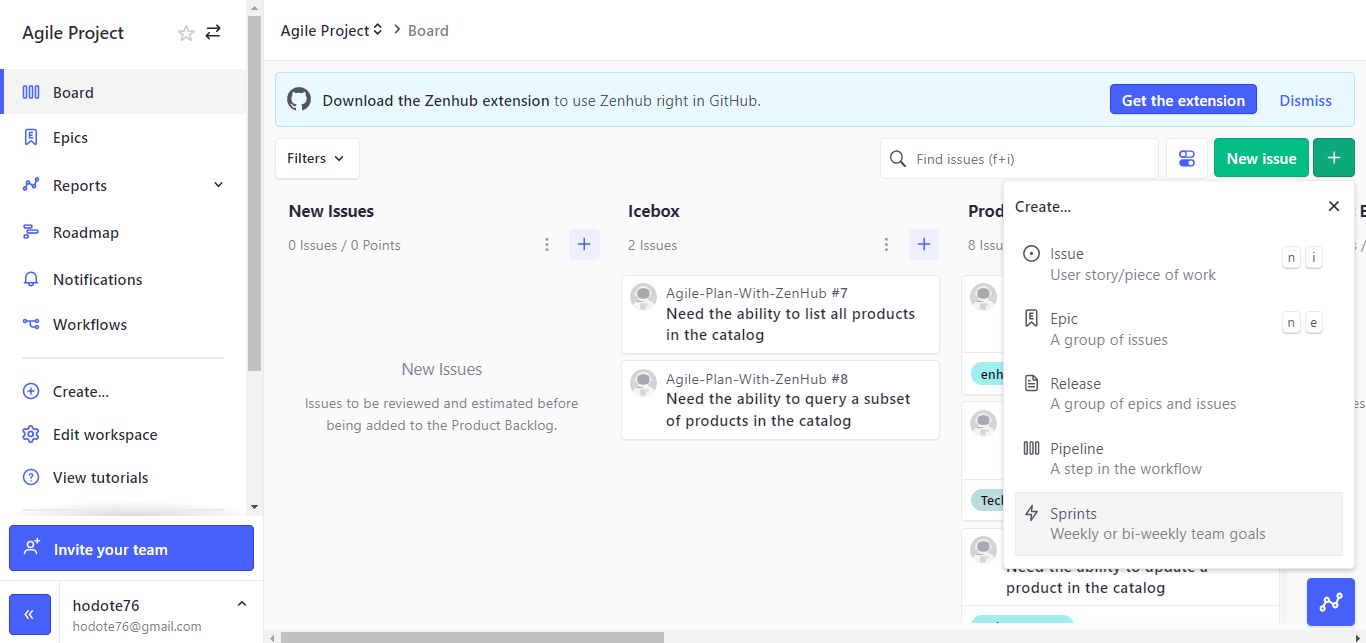
- Select "Sprints." Specify the start and end date. Sprints are usually 1-4 weeks long. Some believe 1 week is too short for a sprint and 4 weeks is too long. For this project, we will stick with 2 weeks.
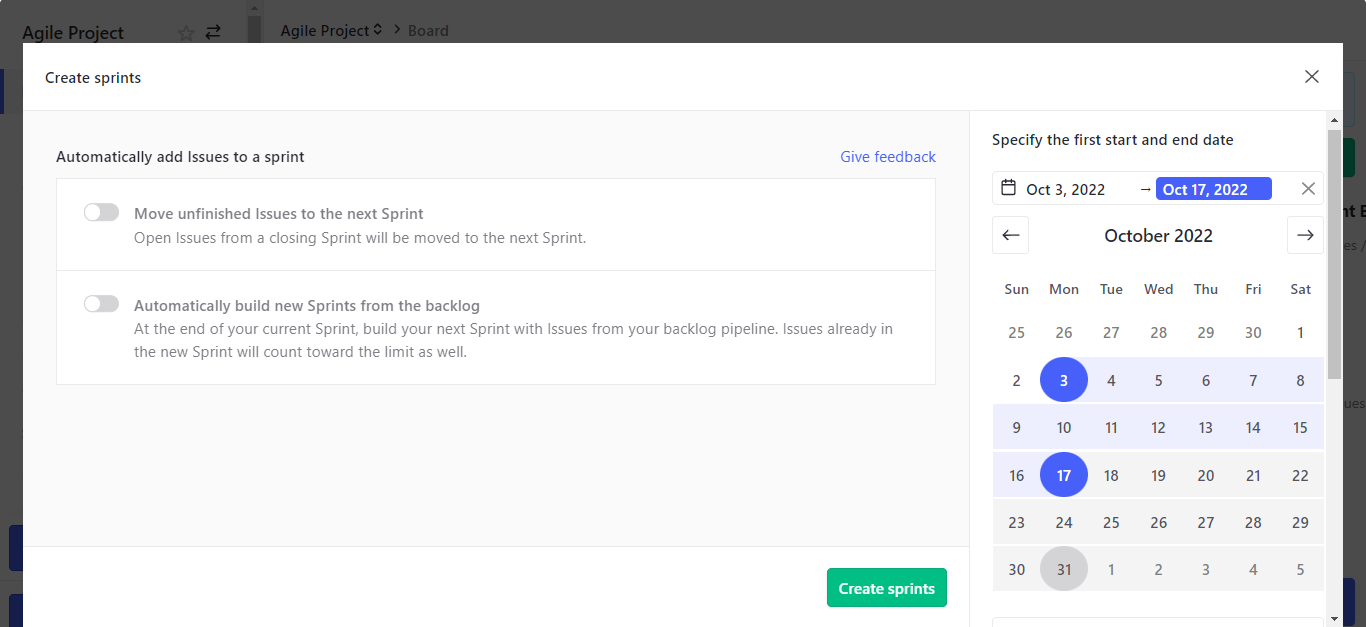
- Click on "Create Sprints."
Sprint Planning
Sprint planning is a process used by software development teams to map out what work needs to be completed during a given sprint (a set time).
It involves discussing with the team the backlog of work that needs to be done and then deciding which items can realistically be completed within the sprint timeframe.
This process helps to ensure that everyone is on the same page concerning what needs to be done and that the team can stay focused and productive.
For this example, we will assume that the sprint planning meeting has already occurred, and the team velocity is 18. The first story has a story point value of 8, the second story has a story point value of 5, the third story has a story point value of 3, and the fourth story has a story point value of 2.
Team velocity is the average amount of work a team can complete in one Sprint. Story points measure the effort required to deliver a user story. Both help teams estimate the amount of work they can realistically achieve in a given sprint.
We will:
- Click on the first story, then select "Sprints."
- Choose the Sprint we created for this project.
- Find the appropriate story point in the "Estimate" section.
- Repeat steps 1-3 for the remaining three stories.
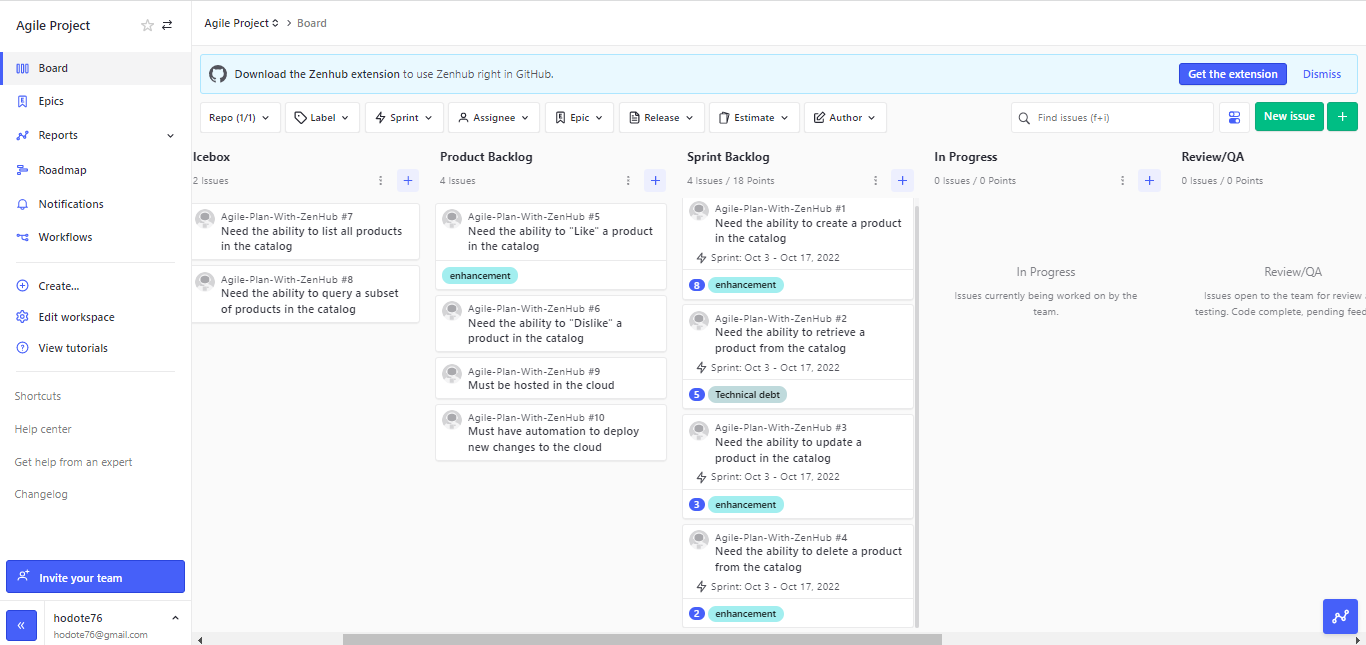
- Our board should look like the image below.
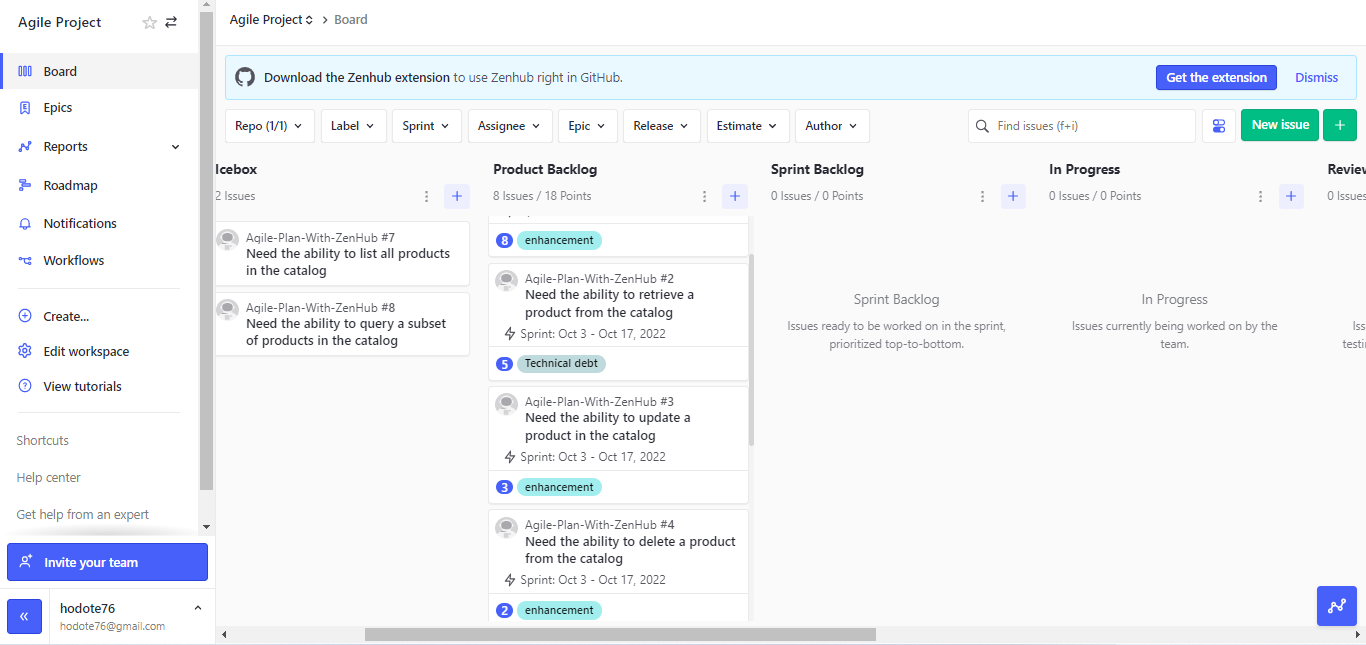
Our top four stories are ready. We will move them to the sprint backlog. Our board should like the image below.
Sprint
A sprint is a time-boxed period of development, typically two weeks long, in which a team works to complete a set of predetermined tasks.
We will simulate a spring by assigning the first project to ourselves.
- Click on the first project
- Click on “Assignees”
- Select GitHub username
- The profile image on our GitHub account should now appear on the first project.
- Move it to the work "In progress" pipeline. Our board should look like the image below.
Other stories in the sprint backlog are moved to the "in progress" pipeline once they are assigned to users. This process is repeated until the two weeks sprint ends.
Review and Quality Assurance
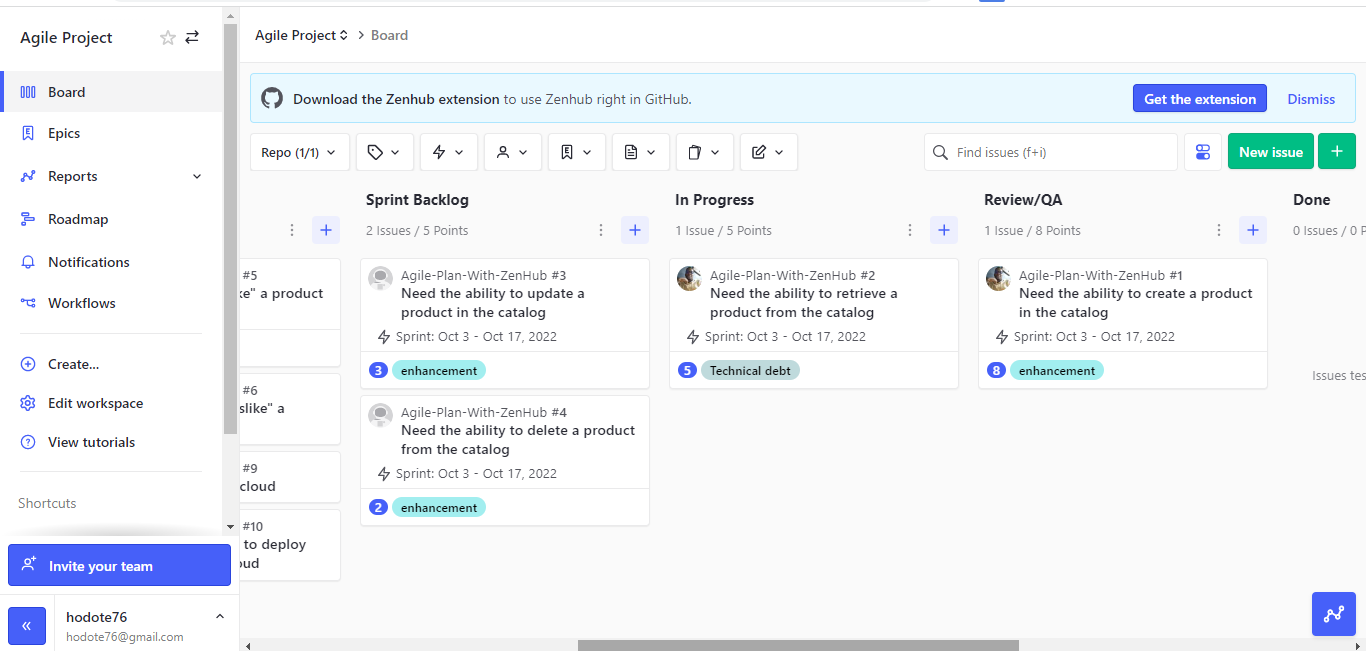
At this stage, we want to ensure the developed function or service meets the quality standards. We will assume the project in the “in progress” pipeline was completed. Hence, we will move it to the “Review/QA” pipeline. Next, we will assign the next project to ourselves and move it to the “in progress” pipeline.
In the end, our board should like this image.
Done Pipeline
This is the final stage in the workflow. At this stage, issues are considered to be completed. We will assume the story in the “Review/QA” pipeline passed. So, we will move it to the “Done” pipeline.
Sprint Review
At the sprint review, the product owner and development team review what was completed during the Sprint and demo the work to the stakeholders. The stakeholders provide feedback, and the product owner may adjust the product backlog based on the feedback.
Sprint Retrospective
A sprint retrospective is an opportunity for the team to reflect on the previous Sprint and identify areas for improvement. It is important to ask the right questions during the retrospective to identify areas of improvement and make necessary changes.
Some important questions to ask during a sprint retrospective include: • What went well during the Sprint?
• What went poorly during the Sprint? • What could we improve on?
• What did we learn?
• What challenges did we face?
There are a few different options for what can happen to user stories that are not completed during an agile sprint. One option is that the team can simply move the user story to the next Sprint. Another option is that the team may split the user story into smaller pieces to make it more manageable. Finally, the team may also completely scrap the user story if it is deemed unnecessary.
Thank you for reading this article on agile planning with ZenHub. I hope you have learned something new that you can apply to your own agile planning process. If you have any questions, please feel free to contact me.


